Triggering a Transactional Campaign
There are 2 ways to trigger a transactional campaign:
-
The dedicated API calls
-
The Scenario app
The API calls are usually favored when real-time sending is required and when the source of the transaction needs to directly trigger the message, without necessarily going through your CRM.
On the other hand, Scenarios are useful to trigger the campaign after a line is created or updated in an Interaction table of your Data Model.
Setting up API calls
To be able to trigger a transactional campaign by API, it must have been activated, which means it appears "In progress" in the interface.
The call will need to refer to either the technical name or the id of the campaign. These parameters can be displayed in the interface by updating the options in the top right corner.

As a rule of thumb, the technical name is the name that you chose at campaign creation without special characters or spaces, but make sure to communicate the right reference to your developers.
Triggering a transactional e-mail
There are two dedicated calls to trigger transactional e-mails. Both allow you to both create (or update) a profile in your transactional DB, and trigger the campaign at the same time.
-
POST /entity/{e}/transactionalmail/{m}/contact will simply trigger the e-mail without attaching any additional file.
-
POST /entity/{e}/transactionalmail/{m}/contactWithAttachment will trigger the e-mail and send files in attachment.
POST /entity/{e}/transactionalmail/{m}/contact
This standard call to trigger transactional e-mails expects an application/json body, in which all the parameters are pushed.
It allows both to create (or update) a new profile in your database thanks to the "profile" object and to push personalizations values in to the "parameters" array.
Each "key" in the objects of the "parameters" array should match the name of a personalization variable defined in the content of the campaign (see the "Personalizations provided by API" point).
{ "profile": {
"attributes": [
{ "name": "emailAddress",
"value": "john.smith@actito.com"
} ], "dataCollection": {
"source": "AGDPRSource",
"way": "AGDPRWay",
"date": "10/09/2019 22:00:00"
} }, "parameters": [
{ "key": "orderIdPerso",
"values": [
"123456"
] }, { "key": "firstNamePerso",
"values": [
"John"
] }, { "key": "externalData",
"structuredValue": {
"items": [
{ "name": "article 1",
"quantity": "1",
"unitPrice": "59",
"productUrl": "https://www.actito.com/be_fr/article_1.html"
}, { "name": "article 2",
"quantity": "1",
"unitPrice": "79",
"productUrl": "https://www.actito.com/be_fr/article_2.html"
} ] } } ]}
Have you noticed the "structuredValue" object in the example above? This is how you push values for loop personalizations, which are very useful to repeat several sets of data in your e-mail, without needing to define the number of items in advance (handy for order confirmations!).
Learn more in Using Loop Personalizations.
POST /entity/{e}/transactionalmail/{m}/contactWithAttachment
This additional call allows you to send attachments with your transactional e-mails, which is very useful for e-ticketing, for instance.
It allows you to attach up to 10 files with a total attachment size of maximum 1 MB (by default). The following extensions are supported: csv, doc, docx, gif, html, jpeg, jpg, pdf, png, xls and xlsx.
If you need to send bigger attachments, please contact your account manager.
This call expects a multipart/form-data body that will be made from at least 2 files:
-
a JSON definition file declared as transactionalMail that will contain the information to create the profile and the personalization values for the e-mail (just like the body of the call to trigger the e-mail without attachments), plus an additional "attachments" object to reference the name of said attachments.
-
one or more attachment files, declared as part1 to part10, that match the files referenced in the definition file and fit the allowed extensions/naming patterns.

{ "profile": {
"attributes": [
{ "name": "emailAddress",
"value": "john.smith@actito.com"
} ], "dataCollection": {
"source": "AGDPRSource",
"way": "AGDPRWay",
"date": "10/09/2019 22:00:00"
} }, "parameters": [
{ "key": "orderIdPerso",
"values": [
"123456"
] }, { "key": "firstNamePerso",
"values": [
"John"
] }, { "key": "externalData",
"structuredValue": {
"items": [
{ "name": "article 1",
"quantity": "1",
"unitPrice": "59",
"productUrl": "https://www.actito.com/be_fr/article_1.html"
}, { "name": "article 2",
"quantity": "1",
"unitPrice": "79",
"productUrl": "https://www.actito.com/be_fr/article_2.html"
} ] } } ], "attachments": {
"part1": "MyFirstAttachedFile.csv",
"part2": "Legal.pdf"
}}
Note that part1 is a required parameter: to use this call, at least one attachment is expected.
If you do not need to send an attached file, please use the standard call.
Setting up a Scenario
It is also possible to trigger your transactional campaigns through the Actito Scenario app rather than by API, especially if you do not use a dedicated transactional database and instead use your main Data Model. This is less frequent, as all the information required to trigger the scenario are not necessarily stored in your Actito Data Model (e.g., password reset).
Using the 'Other interaction' trigger
Thanks to the 'Other interaction' start block, it is possible to trigger the scenario when a new record is created (or even updated) in an interaction table of your Data Model.
For instance, a new record in an 'Orders' table could trigger a scenario that sends an order confirmation transactional e-mail, or updating an existing order to the status "Shipped" could trigger a shipping confirmation scenario.
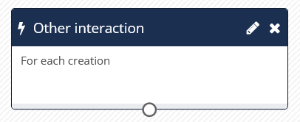
In the block, you will be able to choose your Interaction table and the trigger event (if multiple events are configured in your table).
By default, all tables have an event corresponding to the creation of a new line. It is also possible to define events for updates of existing lines (for instance, when the "Status" field of your "Orders" table is updated from the value "CONFIRMED" to the value "SHIPPED").
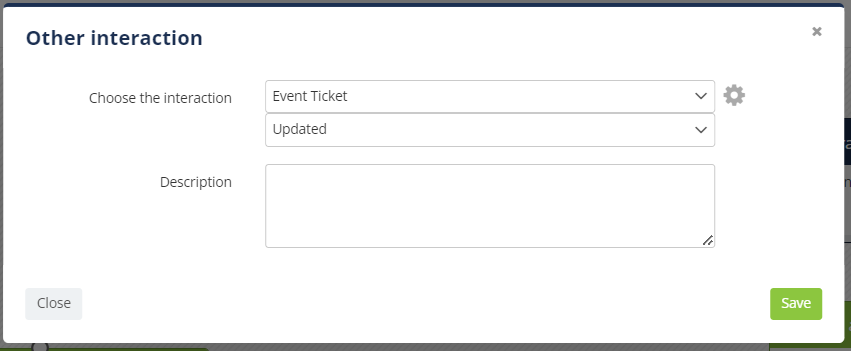
Events corresponding to 'updates' must be defined in the structure of your Interaction table.
If you need help with the modification of the structure of your table, please contact Actito support or your account manager.
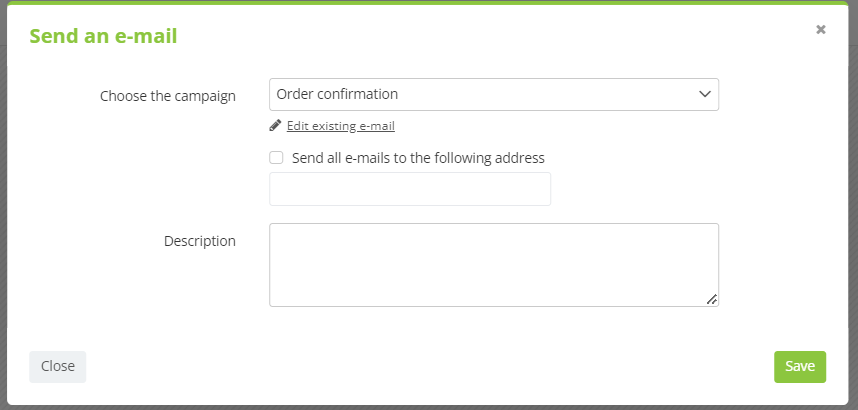
Then, you will be able to add a "Send an e-mail" block and select your transactional campaign.
The advantage of Scenarios is that you can continue to build your workflow using the various blocks available in addition to the sending of your transactional message.
You can mix channels, or send a (non-transactional) satisfaction e-mail some time after an order, for instance.
Note that this still requires you to feed your Interaction tables to trigger the start condition of the scenario.
This can be done by 1by1 API if you have real-time constraint, and by bulk API imports or ETL synchronization if you want to import large amounts of data at once.
Using the 'Start' trigger
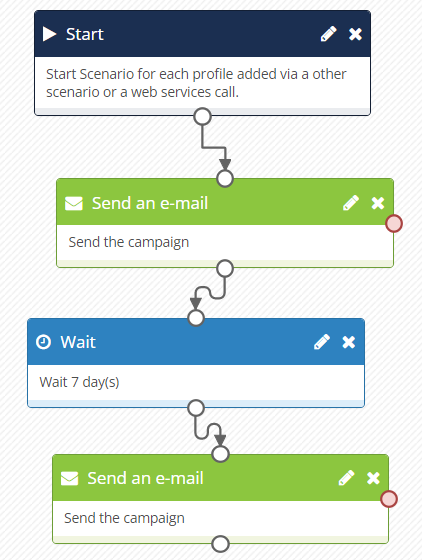
It is also possible to start the scenario containing your transactional campaign with the Start block and an API call.
This is useful if you want to mix several communication modes at different times (like sending an order confirmation and 7 days later sending a satisfaction survey), but the trigger of the transaction is not a newly created (or updated) line in an Interaction table of your Data Model.
Note that in this case, all personalizations values for the campaigns need to be stored in the Actito Data Model and cannot be pushed in the call triggering the scenario.