Exporting your Table Data
To start your export, go to the 'Datamart Studio' application ( Catalog > Datamart Studio) or via the sidebar to the left of your screen. You can also directly access the 'Manage exports' app through the catalogue (Catalogue > Profiles > Manage exports) .
After reaching the 'Datamart Studio', you have two options to export your table data.
Creating an Export
Via the data model representation
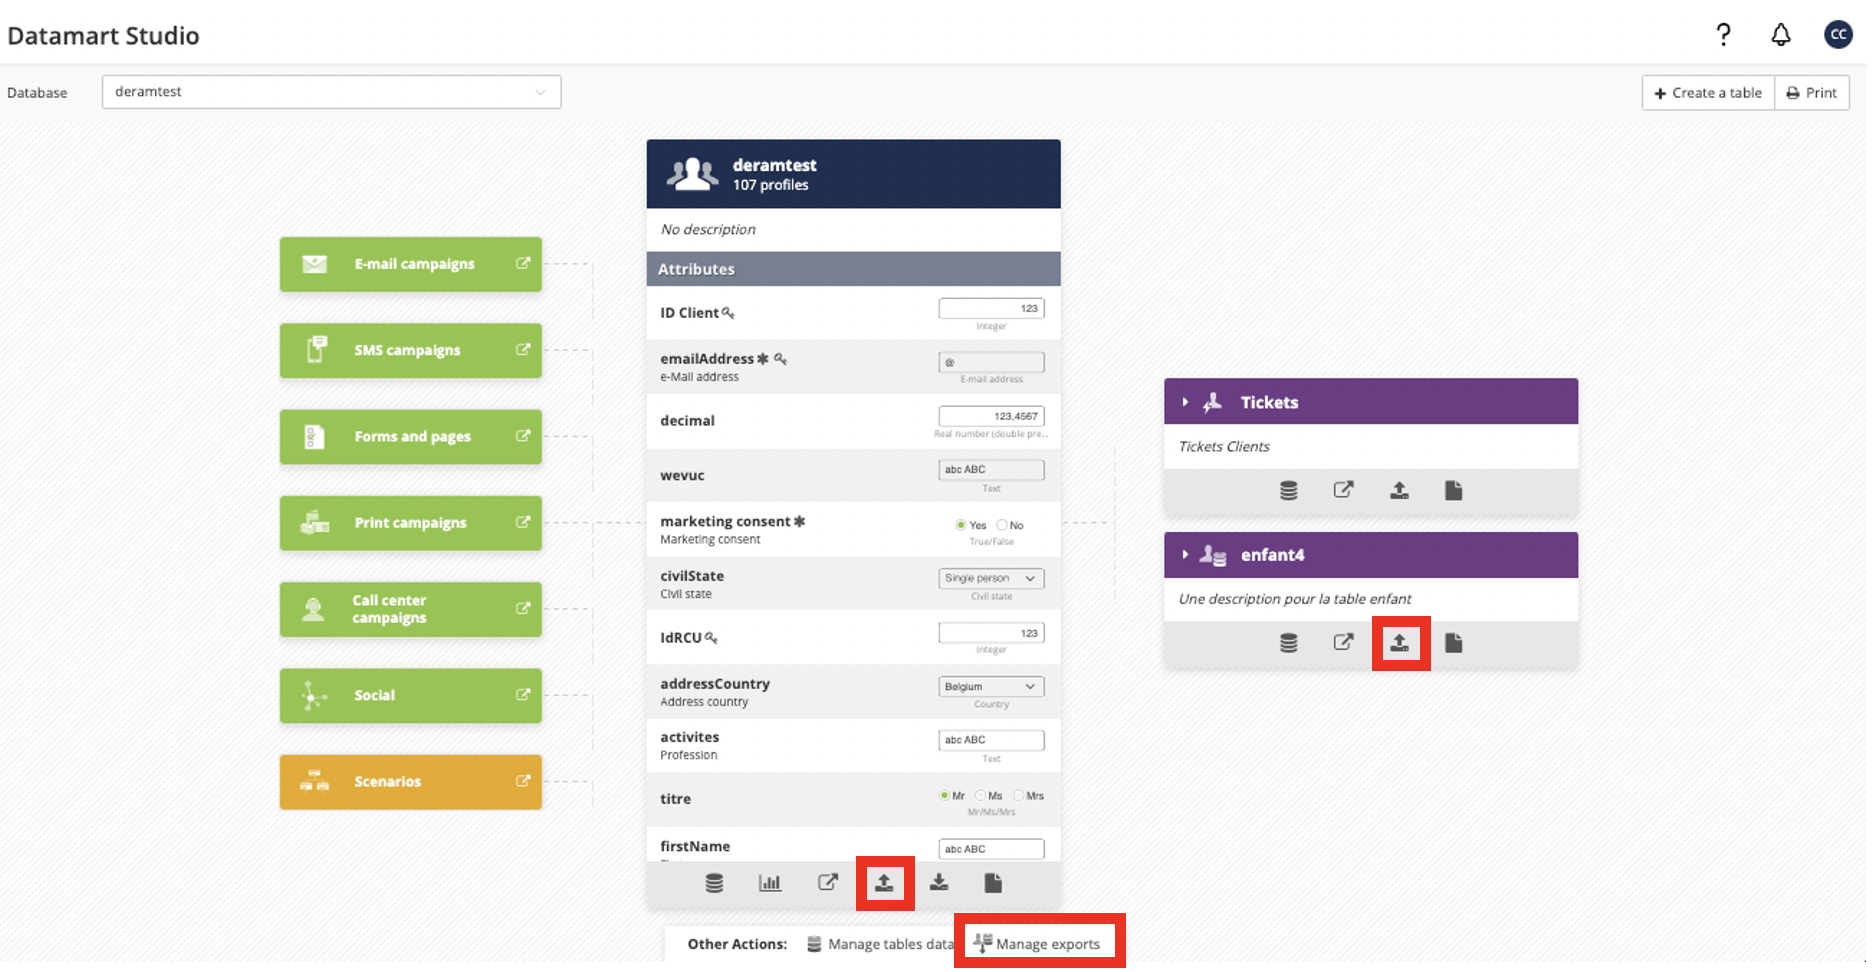
In the drop-down menu at the top of your screen, select the profile database that you want to export or the profile database to which is linked the custom table to export.
Next, click on the 'Manage exports' icon below the relevant custom table. It's important to take into account that thought this method you can only create one shot exports.
Via the 'Manage exports' application
You will be able to create a new export by clicking on 'Create an export'.

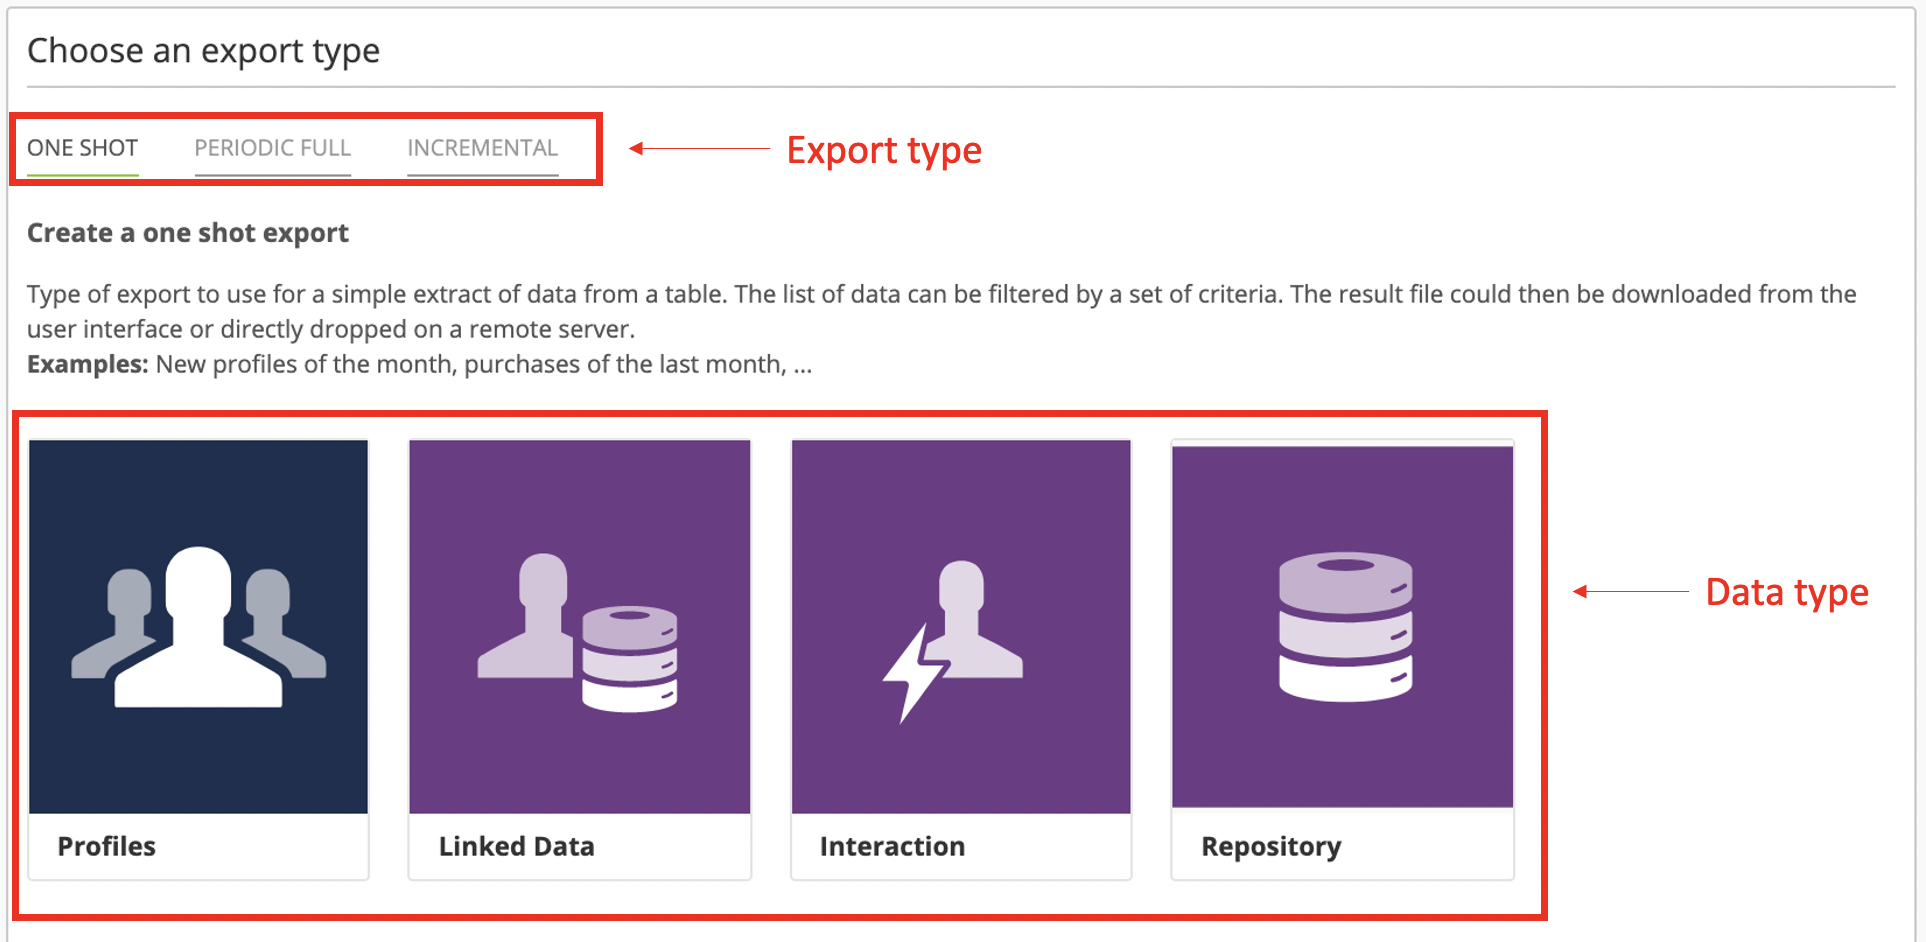
Via the 'Manage exports' application, you need to select the type of export that you are to create. If you have any questions about the different types of exports, please check this article.
Exporting data
Step 1: General data
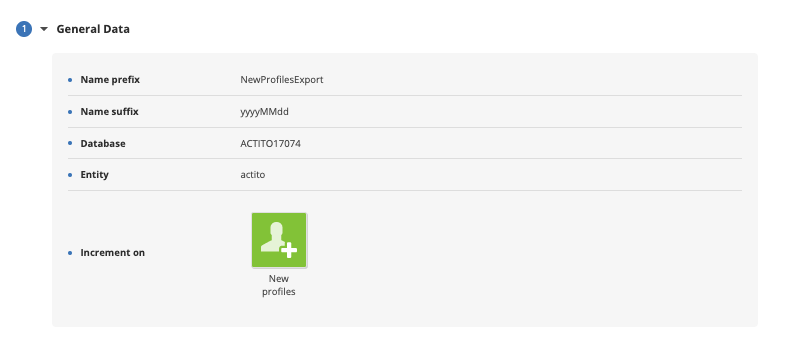
During the first stage of the export creation, you will have to define:
The name of your export: this is the name that will be given to your resulting file. If you are creating a periodic full export or an incremental export, the name of your export will have a prefix and a suffix. While the prefix will be common to every export file, the suffix will be automatically modified to indicate the export date.
The database whose data you want to export.
The entity in which this export will be available.
If you are exporting custom table data, you will be also asked to specify the table.
If you are creating an incremental export, it is also in this step where you are asked to select the reason on which your incremental exports will be based: new profiles, updated profiles or both.
The name prefix of an incremental or full periodic export is the actual name of the resulting file. The suffix will indicate the date of the export and will be modified automatically in every export.
So, for example, if you use as prefix 'NewProfilesExport', and you select as preffix 'dd/MM/yyyy', the full name of the export file generated on the 10th of February 2020 will be 'NewProfilesExport_10/02/2020'.
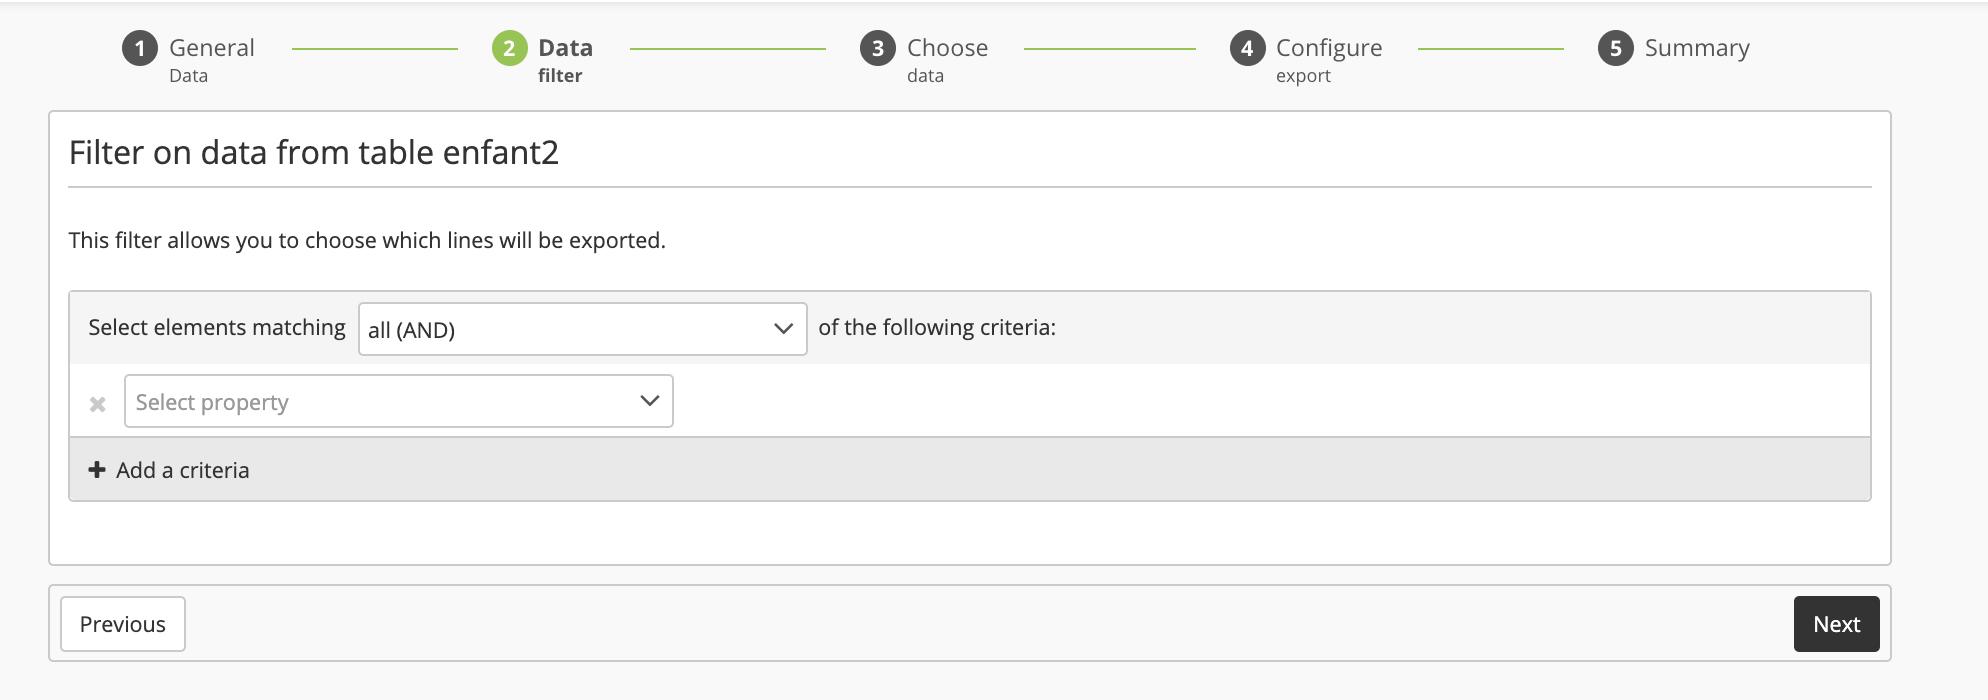
Step 2: Data filter
This step only applies to one shot exports.
It involves the use of the targeting module. For detailed information about how to use it, we invite you to read the chapter dedicated to Targeting in Actito.
Step 3: Choose data
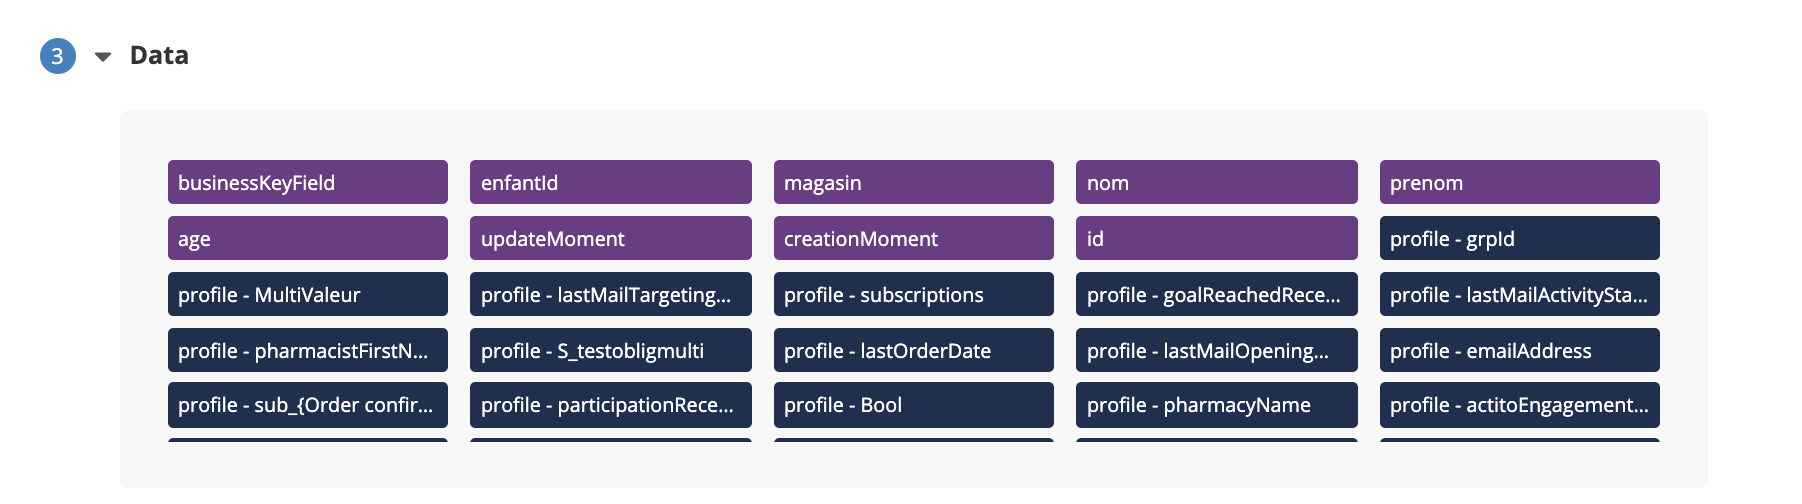
The goal of this step is to define what columns will appear in your export by selecting what attributes to include. There are two types of attributes, that you will see or not depending on your export type.
Attributes of the table to export
These are the attributes of a custom table. You will recognise them more easily by their purple color. You can select table components as well as technical data related to interactions (creation date, update date...).
To modify the structure of the Excel file obtained after the export, you can change the order of the blocks by dragging and dropping them.
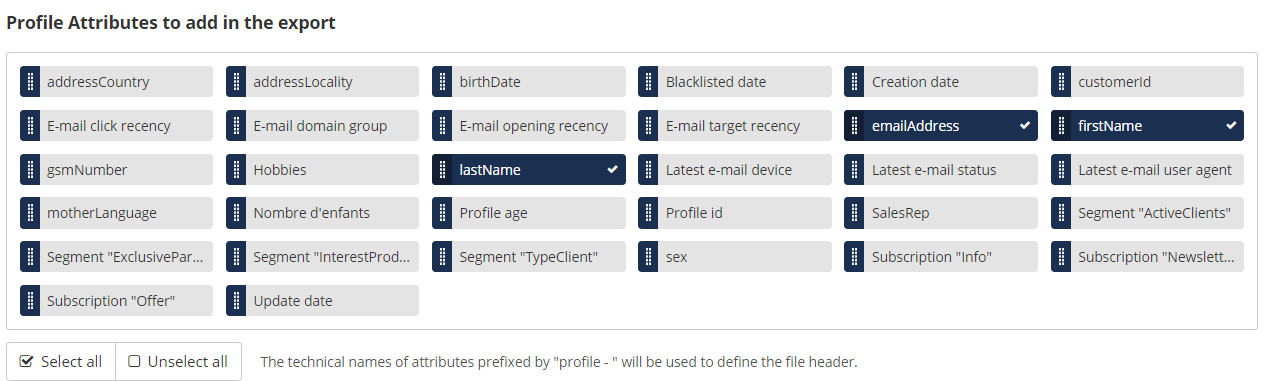
Profile Attributes to add in the export
These are the profile attributes. You will recognise them more easily by their blue color. You can select profile attributes as well as technical data (creation date, update date...).
To modify the structure of the Excel file obtained after the export, you can change the order of the blocks by dragging and dropping them.
Please note that:
It is possible to exclude columns by clicking on unwanted elements, or to click on the 'Unselect all" button and make your choice from scratch.
Data are listed alphabetically by default.
In the interface, you will see the 'display name' given to the attributes. Their 'technical names' will appear by hovering your mouse over the attribute. However, your export will use the 'technical names' of the attributes in the column headers.
Tip
Profile attributes can also be added to an export of a custom table. In that case, the profile attributes would belong to the profile to which the custom table data are linked.
Step 4: Configure export
At this step, you will be able to configure the format of your export.
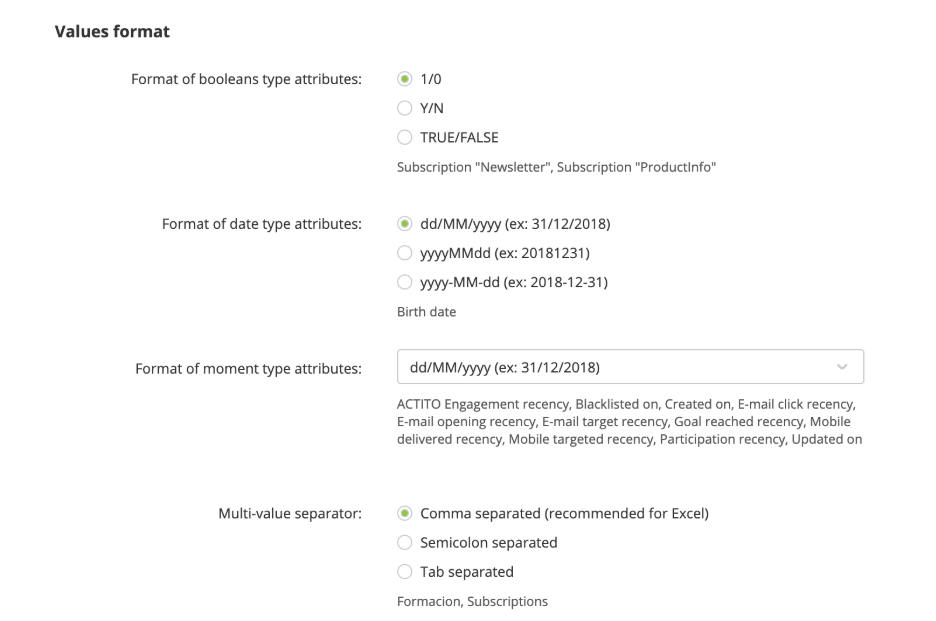
Format of values
Configure the settings for the values of your file content.
Each of these options will only appear if your export contains attributes of the corresponding type. The relevant attributes are displayed under the format suggestions.
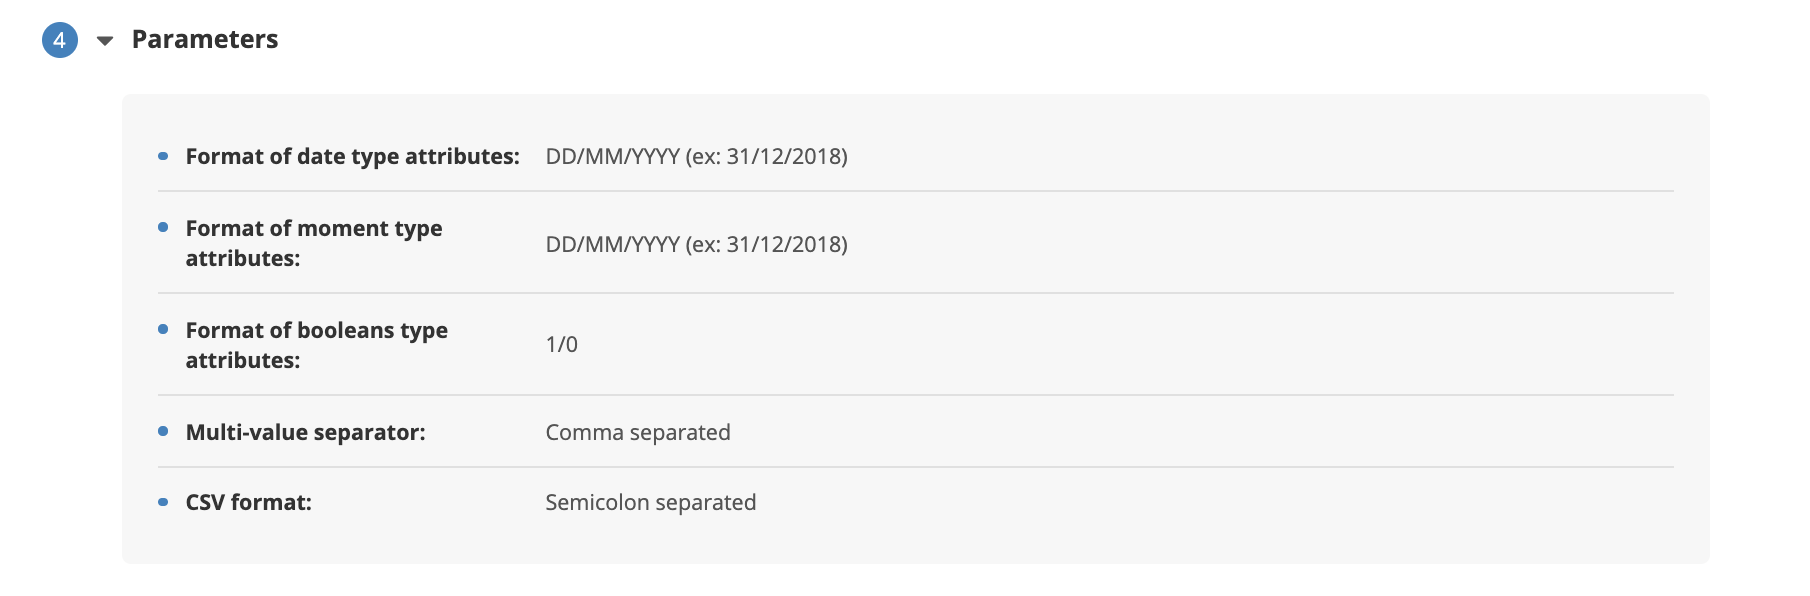
Format of "booleans" type attributes : select the format for the attributes whose values are true or false (e.g.: subscriptions displayed as single-columns): 1/0, Y/N, or TRUE/FALSE
Format of "date" type attributes: select the format of the attributes of date type (e.g.: birthdate).
Format of "moment" type attributes: sele ct the format of attributes of time and date type (e.g.: technical attributes of creation time or of recency). Different levels of accuracy (with or without the time) and format are available.
Multi-value separator: sel ect the separator of attributes that can take several values (e.g. single-column subscriptions, hobbies,...). This is not the global separator of the file (selected in the next section).
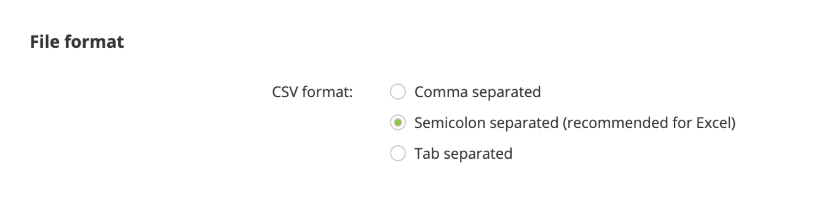
Format of file
At this step, you will be able to choose the settings of the file.
The file is in CSV format, with UTF-8 encoding. You can choose what type of value separator you would like in the file:
commas
semicolons
tabs
Export example
A sample of 10 profiles will allow you to preview the values and columns you will get in your export file.
Step 5: Summary
This stage will let you start the export. Your export summary is divided in different sections.
First, you'll find the 'General Data' section, reminding you of the name, database and entity of your export, as well as the criteria for incremental export.
 In the targeting section, you will find information on your target, as well as the number of targeted profiles. Remember that this section only applies to one shot exports.
In the 'Data' section, you will see all the data fields that will be included in the export.
In the 'Parameters' section, you will be able to verify that you selected the right data and file parameters.
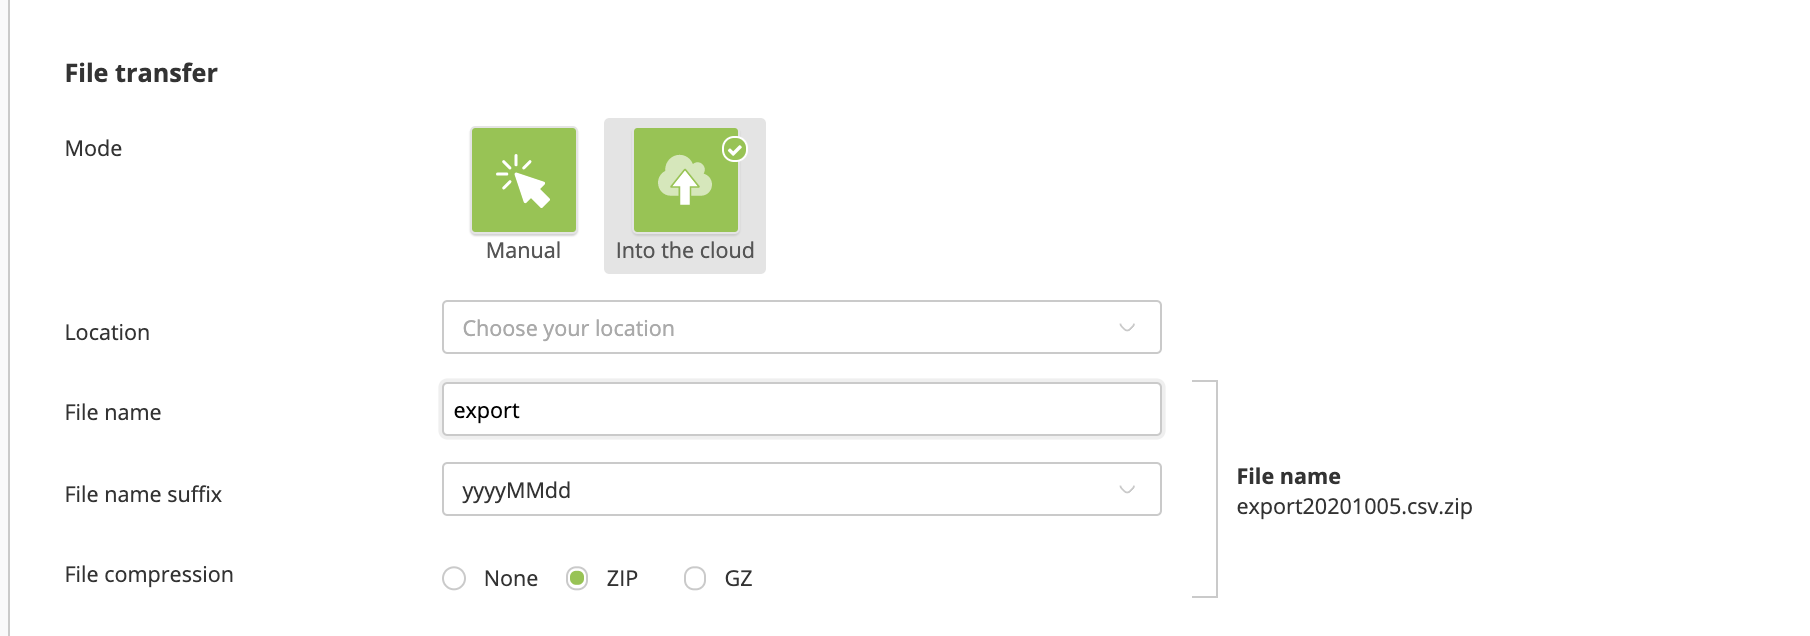
Once you have checked the summary and you are sure that you have correctly defined your export, you can proceed to select the way in which you want to transfer the exported data.
You can do it either manually or automatically into the cloud location that you choose. In this second case, a number of additional parameters must be defined, namely the exact location, the file name, the name suffix and the type of file compression.
Important
Remember that peridoic full and incremental exports can only be transferred into the cloud. Therefore, the 'Manual' button will be greyed out when creating one of these exports.
If there are no cloud locations available for your license and you would like to start using this feature, please contact our support or your Actito contact person.
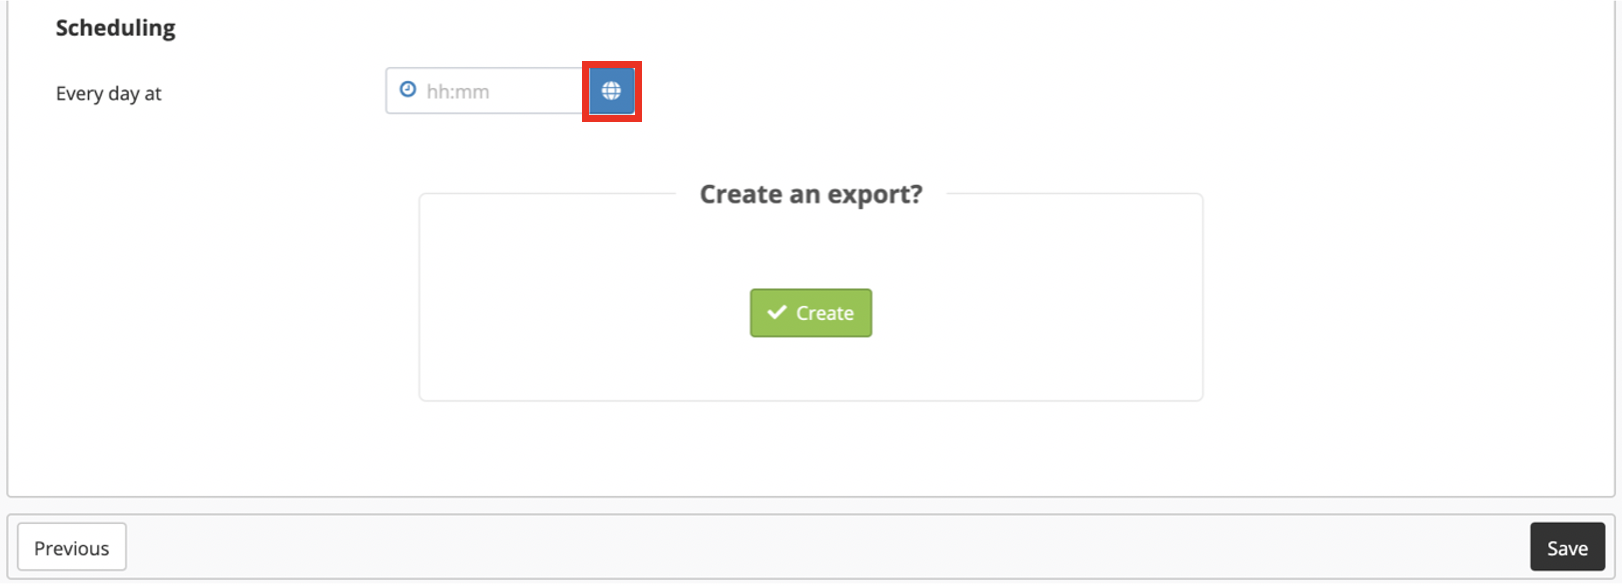
For periodic full and incremental exports there will be an extra section called 'Scheduling'. This is the section that allows you to define the time at which the export will be generated every day.
By clicking on the world icon, next to the time field, you will access a time convertor to help you set the right time.
We are now ready to finish the definition of your export. If you would like to create the export, click on 'Create'. You can also click on 'Save' if you want to continue editing the export later. You will find it in the 'In definition' tab of the 'Manage exports' app.
After launching the export, you will automatically exit the creation process and you'll be sent back to the main menu of the application used to start the export (''Datamart Studio'' or 'Manage exports').
Info
The export creation will be immediate. A pop-up will inform you of the success of the creation.
 Click on this pop-up to immediately go to step 6.
Step 6: Download your export
Depending on the export type, you will find the export file in one place or another.
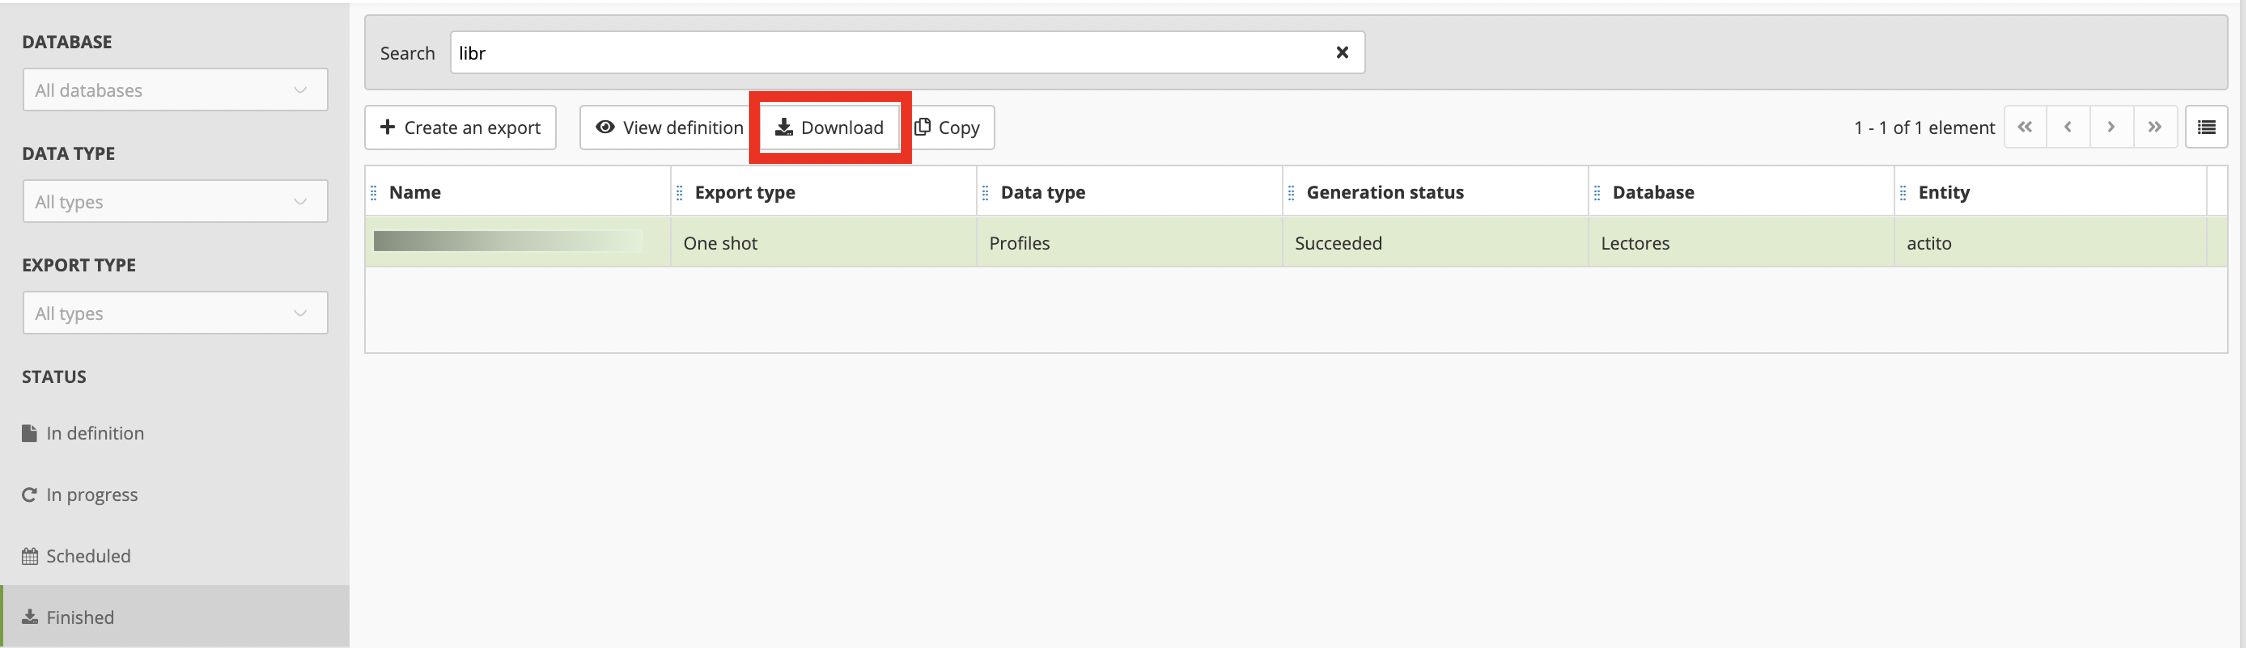
For one shot exports, go to the 'Manage exports' app and select the 'Finished' tab, then choose the relevant export. The line in question will turn green.
Finally, click on the 'Download' button. The file will be automatically downloaded on your computer.
For incremental or periodic full exports, you can go directly to the 'Transfer box'.
Look for your export name and download the relevant file by clicking on 'Download'.

Good to know
After its creation, an export is available for download during 30 days.