Creating Segmentation Rules
The purpose of a segmentation is rarely to be set is stone, but rather to mirror the evolution of the state of your profiles over time. A prospect can indeed become a client, a Silver client can reach the Gold category... while an active client can become inactive.
It is therefore appropriate to define an automatic segmentation rule that will be calculated once a day in order to take into account any modification in the behavior of your profiles.
To do so, go to the 'Segment profiles' application (Catalog > Automation > Segment profiles) .
After opening this application, you will obtain the list of every segmentation that exists in your licence.
Click on the the '+ Create segmentation' button to create a new rule.

Step 1: General data
Give a name to your segmentation rule, then choose the profile database on which the segmentation rule will be applied.
The dropdown menu will only display databases for which an existing segmentation has already been created in the Profiles menu (as explained in the chapter dedicated to 'Creating a Segmentation').

Step 2: Target group
The second step consists in using the targeting module to define the target selection criteria, exactly as explained above.
Every profile matching the target calculation will be added to the segment that you will have to specify at step 3.

Tip
In the case of an exclusive segmentation, it is highly advised to define both an entrance threshold and an exit threshold in your targeting. For example, if the Silver segment is defined as an average basket of at least 35€, and at least 50€ for the Gold segment, you should specify that a profile must be part of the target population once its average basket reaches 35€, but no longer if it reaches 50€.
This is especially important if you choose the 'Match' option at step 3.
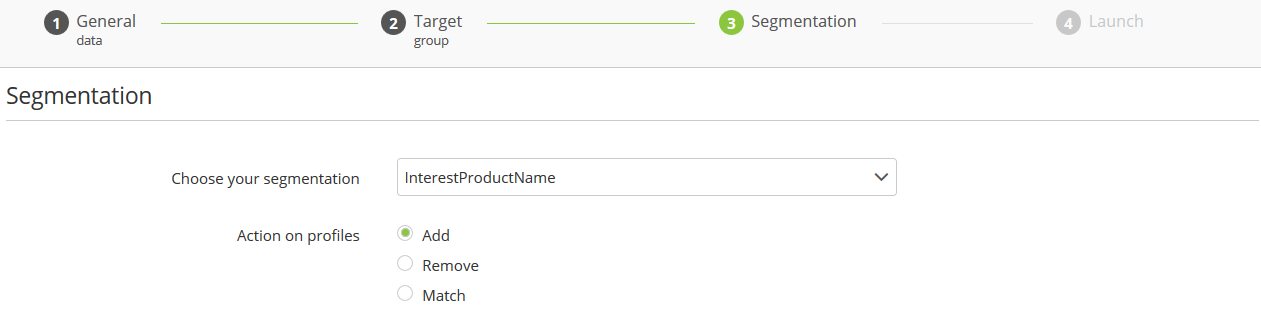
Step 3: Segmentation
At the third step, choose the name of the segmentation created beforehand in the Profile module and on which you want to define the rule.
Next, you will have to choose the action that you will carry out on profiles. The following options are available:
Add: Add profiles matching the target population to the segment
Remove: Remove profiles matching the target population from the segment
Match: Match profiles from the segment with profiles obtained with the targeting. This implies both adding profiles that match the targeting criteria and removing profiles who no longer match them.
Simple Segmentation
Details of the step if the chosen type of segmentation is Simple
Tip
Due to the nature of simple segmentations, the most relevant option is usually to 'match' the profiles. This type of segmentation is indeed straightforward: either the profile belongs to it, or it does not belong to it. In such a case, it is usually not necessary to keep a profile who no longer matches defining criteria.
Exclusive Segmentation
Details of the step if the chosen type of segmentation is Exclusive
 In the case of an exclusive segmentation, you will have to first of all choose the segment for which you will create a rule. It will be necessary to create a segmentation rule for each segment.
If you choose the 'Match' action, you will be invited to answer two additional parameters:
Remove profiles currently in the segment and NO longer matches targeting criteria: Check this box to confirm that profiles formerly found in the segment that no longer match the segment-defining targeting are effectively transferred in the segment chosen at the next step ('Other profiles will be added to segment'). If you do not check this case, every profile who do not match the targeting will be added to the segment chosen below.
Other profiles will be added to segment: select the segment in which profiles who no longer match the targeting will be transferred.
Step 4: Launch
The last step will present you a summary of:
The segmentation (or segment) on which the rule is applied, as well the action that will be carried out.
The rule-defining targeting criteria
Next, you can check the 'Activate automatic segmentation' at the last step so that your segmentation is automatically updated once per day. If you do not check this box, your new rule will be a one-off.

Finally, you can click on 'Start segmentation'.
Good to know
Automatic segmentation rules are calculated once a day.