Conditioning an E-mail
With display conditions, different blocks of the same message can be shown or not shown to a profile depending on a series of pre-determined conditions.
The result is that some parts of your content will only be seen by the profiles who meet the relevant criteria.
Add a condition on the editor
In order to be able to condition the content of your email blocks, you will need to create different blocks for every content variation. You can duplicate a block and change only the content that will vary depending on the recipient.
Next, click on the "Condition" button, at the top right of the block.

The condition editor will open.
You can start by renaming the condition. Its default name is "condition" followed by a number.
Tip
The name given to the condition will be used as a variable. It is therefore important not to name a condition the same way that you named a personalization.

Set the parameters of a simple condition
The basic criteria to define a condition are the profile attributes, including Subscription and Segmentation. For example: varying the content of our email depending on the profile's age or country, or the segment to which they belong.
After clicking on "Add a criteria", you will be able to combine criteria based on the different attributes by selecting them on the drop menu. You will also be able to select the operator and the condition value.
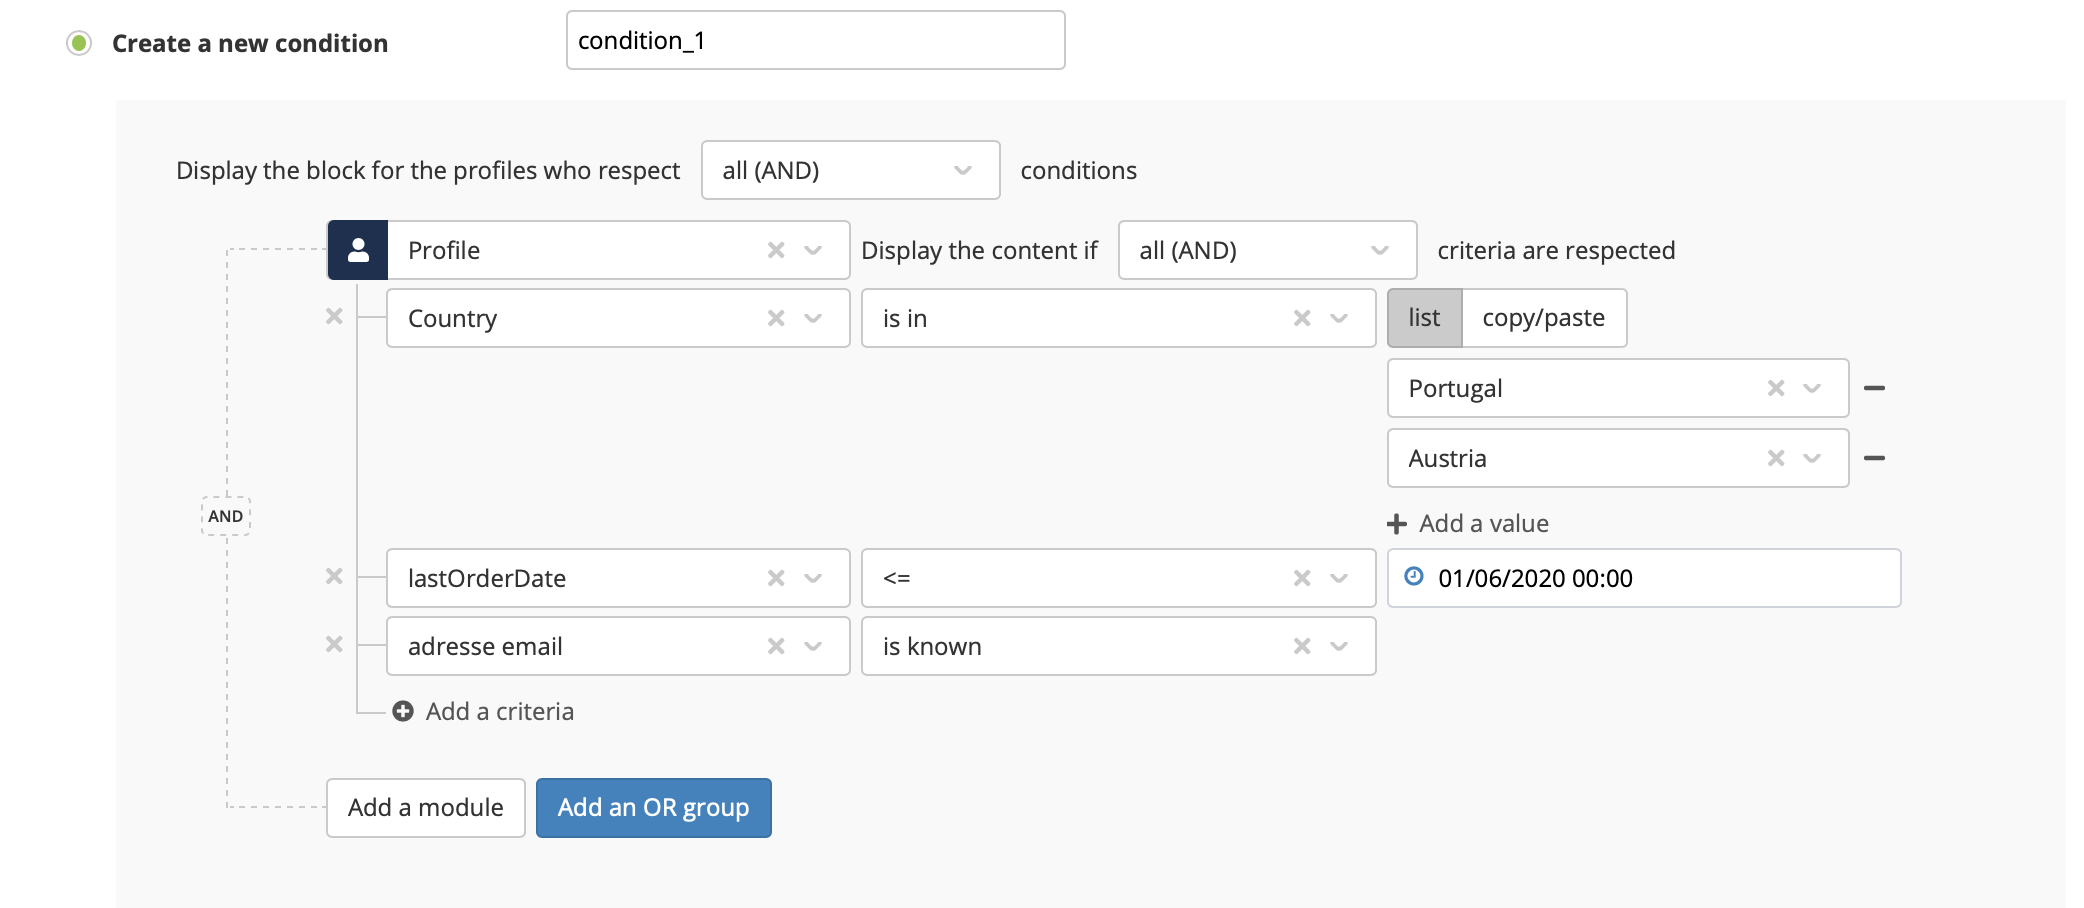
The available operators for all the attributes are:
"="/ "is different from": the attribute value matches / doesn't match a given value.
"is in" / "is not in": the attribute value is included / is not included in a list of possible values.
"is known"/ "is not known": there is / there is not a value recorded for the attribute.
The following operators are also available for date, integer and real number fields:
">" / ">=": is greater / greater or equal (equivalent to "is more recent than" for dates).
"<" / "<=": is lower/ lower or equal (equivalent to "is older than" for dates).
Set advanced criteria as parameters
It might be the case that you need to use more specific criteria to set the conditions for your e-mail, such as, for example, the cost of your profile's last purchase or their answer to a satisfaction survey.
For that reason, you can also use the following three advanced data sources:
Survey: to use Actito forms as data sources, such as the answer to a formulated question.
Table: to retrieve the data of your additional tables (data model).
File: to set the conditions based on an external file (csv) with data that are not worth storing on Actito.
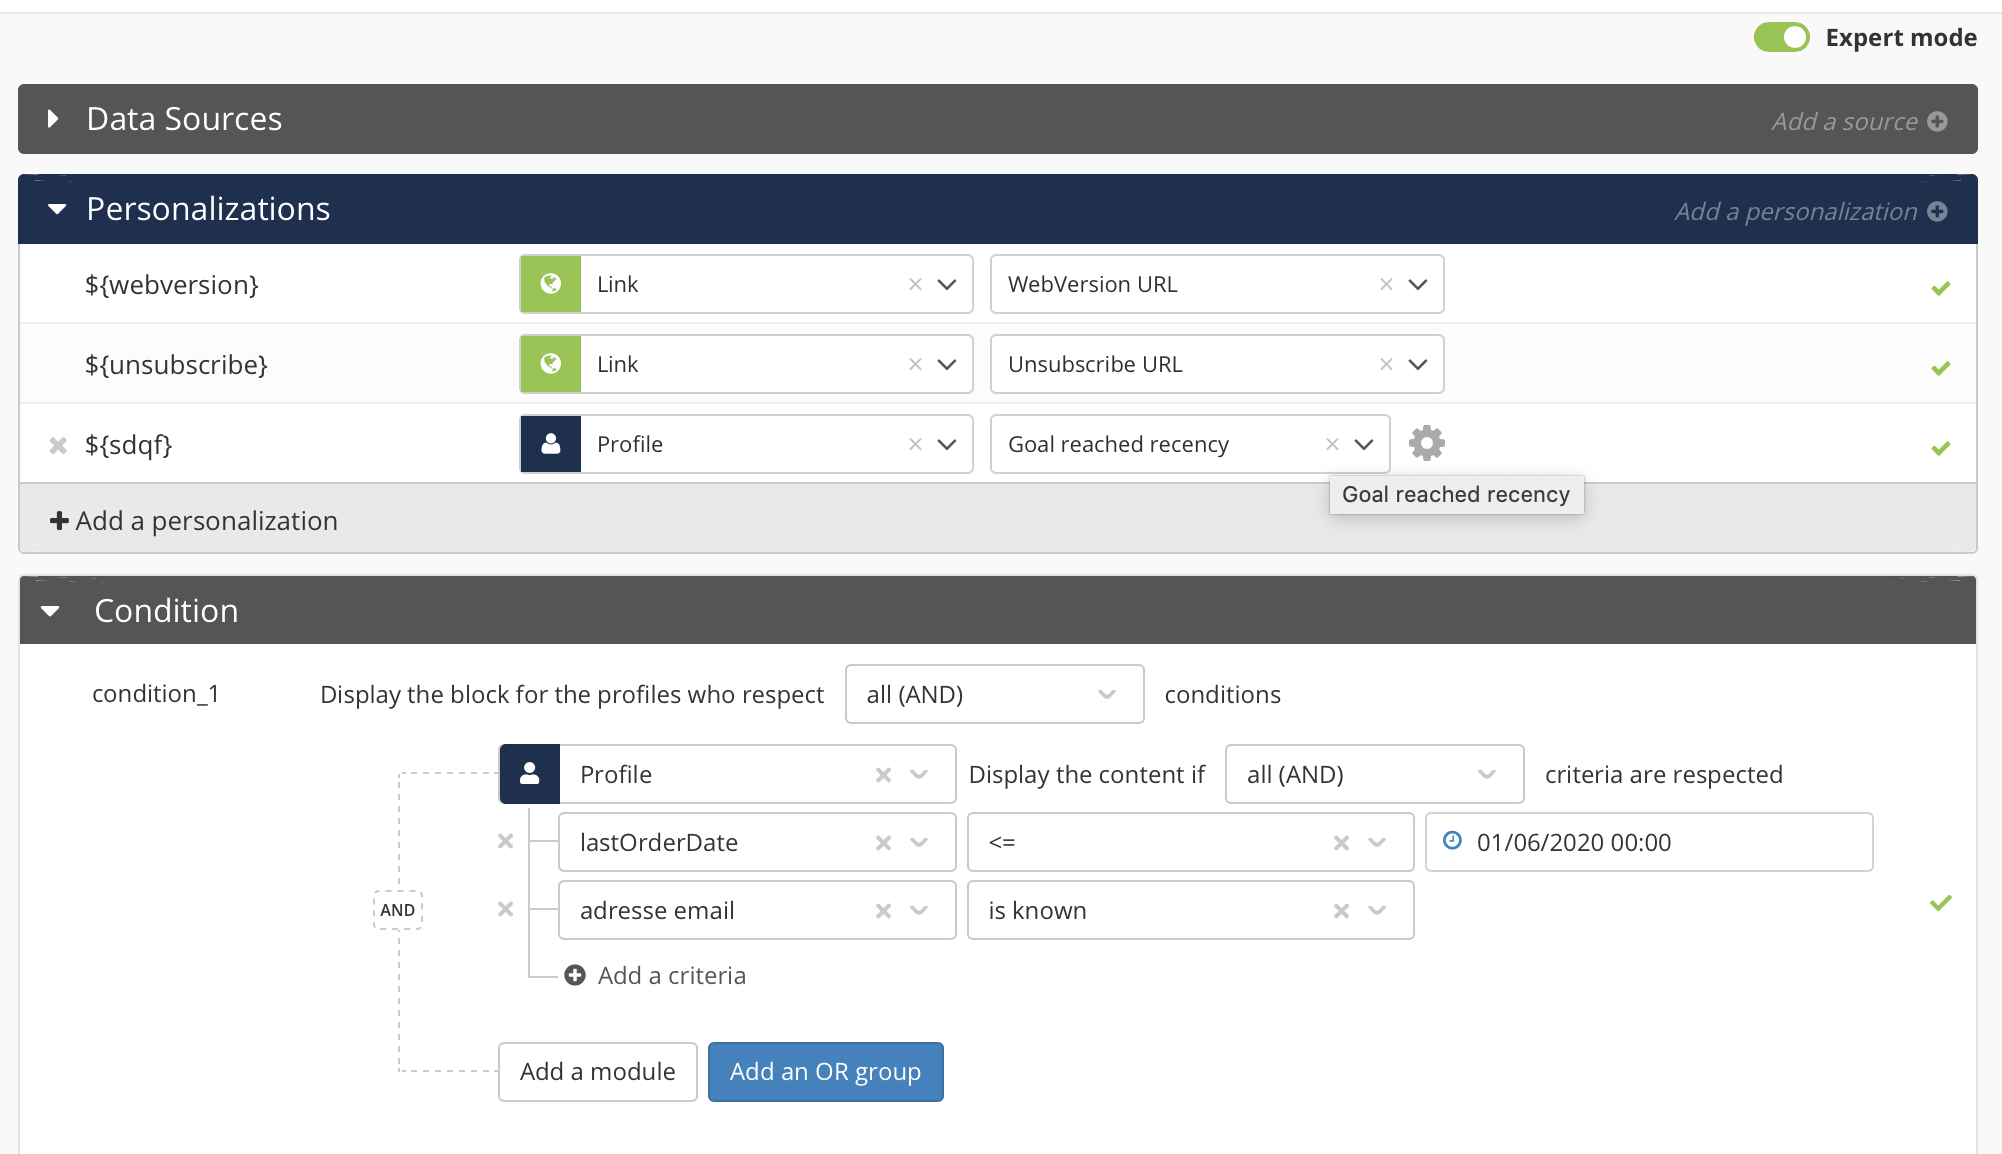
These advanced data sources must be set through the personalizations editor first. For that, don't forget to activate the expert mode first.
For more information in this regard, we invite you to read the expert mode section in the page about personalizing an e-mail.

Once the parameters have been defined, the sources will be available on the drop-down menu after clicking on "Add module".
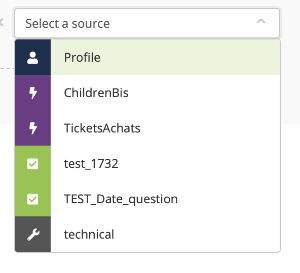
You can also set criteria based on your custom table fields, the answers to your forms, or the columns in a file.
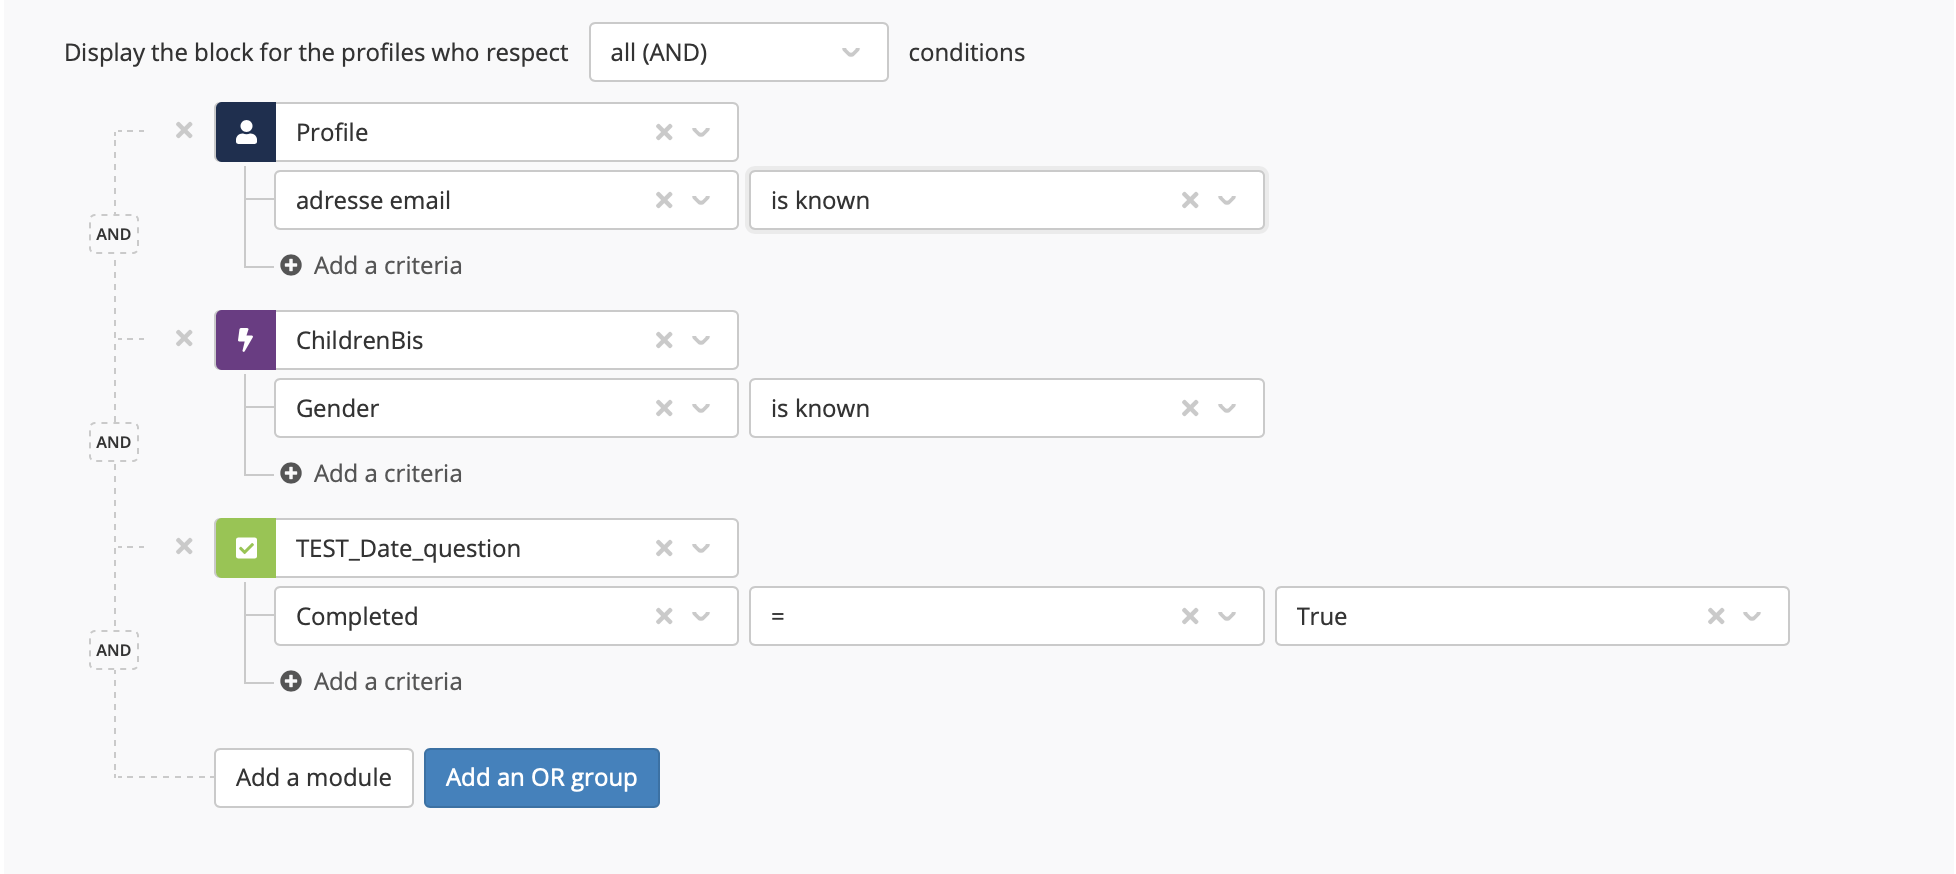
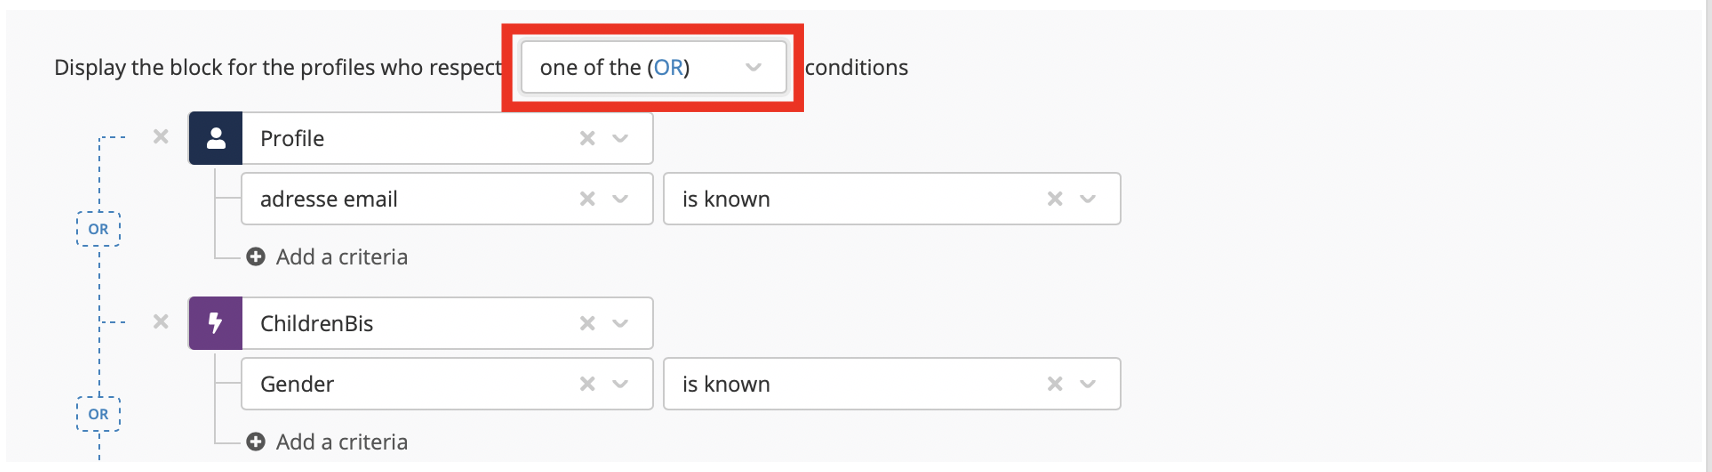
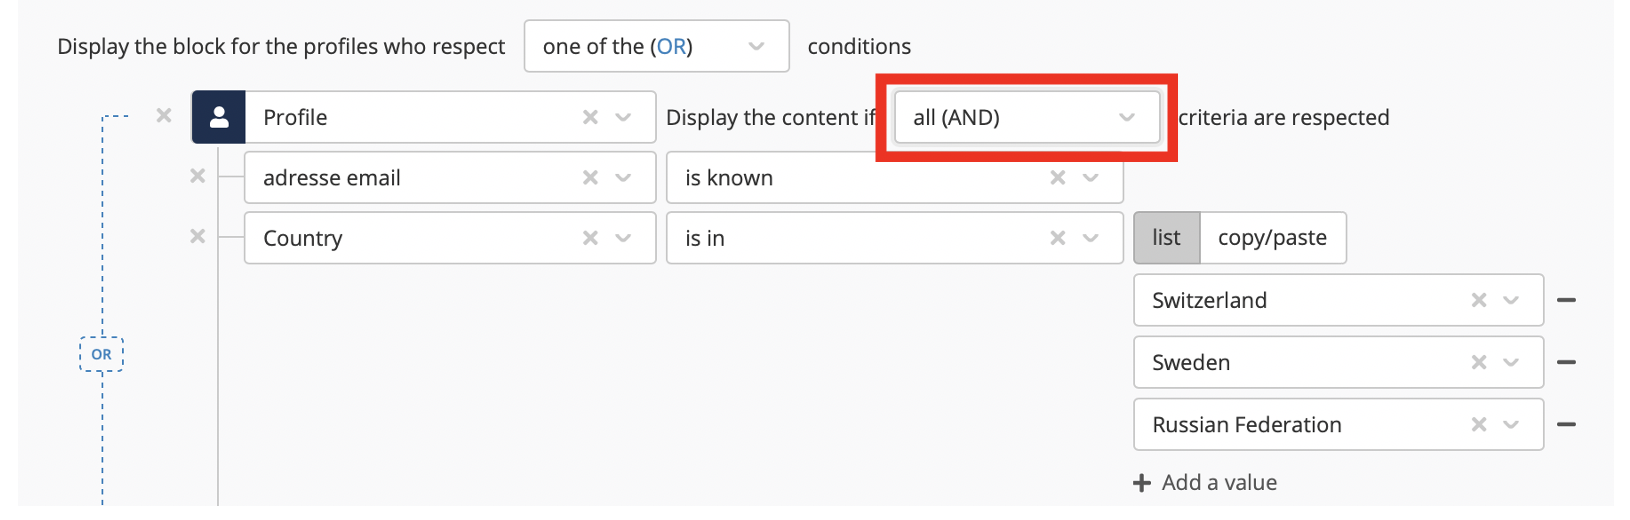
Operators: AND and OR
You can use the operators AND and OR to combine different criteria:
AND means that all the criteria must be matched for a condition to be fulfilled and, therefore, a block to be displayed.
OR means that only one of the criteria must be matched for a condition to be fulfilled and, therefore, a block to be displayed.
These operators allow you to define more complex conditions for your blocks.
You can use these operators to combine different modules or to combine different criteria within one module. There are two different levels at which we can define a condition:
The "Add a module" button allows you to add a data source (be it profile attributes or advanced data sources). Different modules can be added based on the same source.
The "Add a criteria" button allows you to add a rule within a module.

The first drop-down menu, in the upper part of the condition section, allows you to choose the operator that will rule the relationship between the modules.
If you add a second criterion within the module, you will be able to select an operator for the module's criteria.
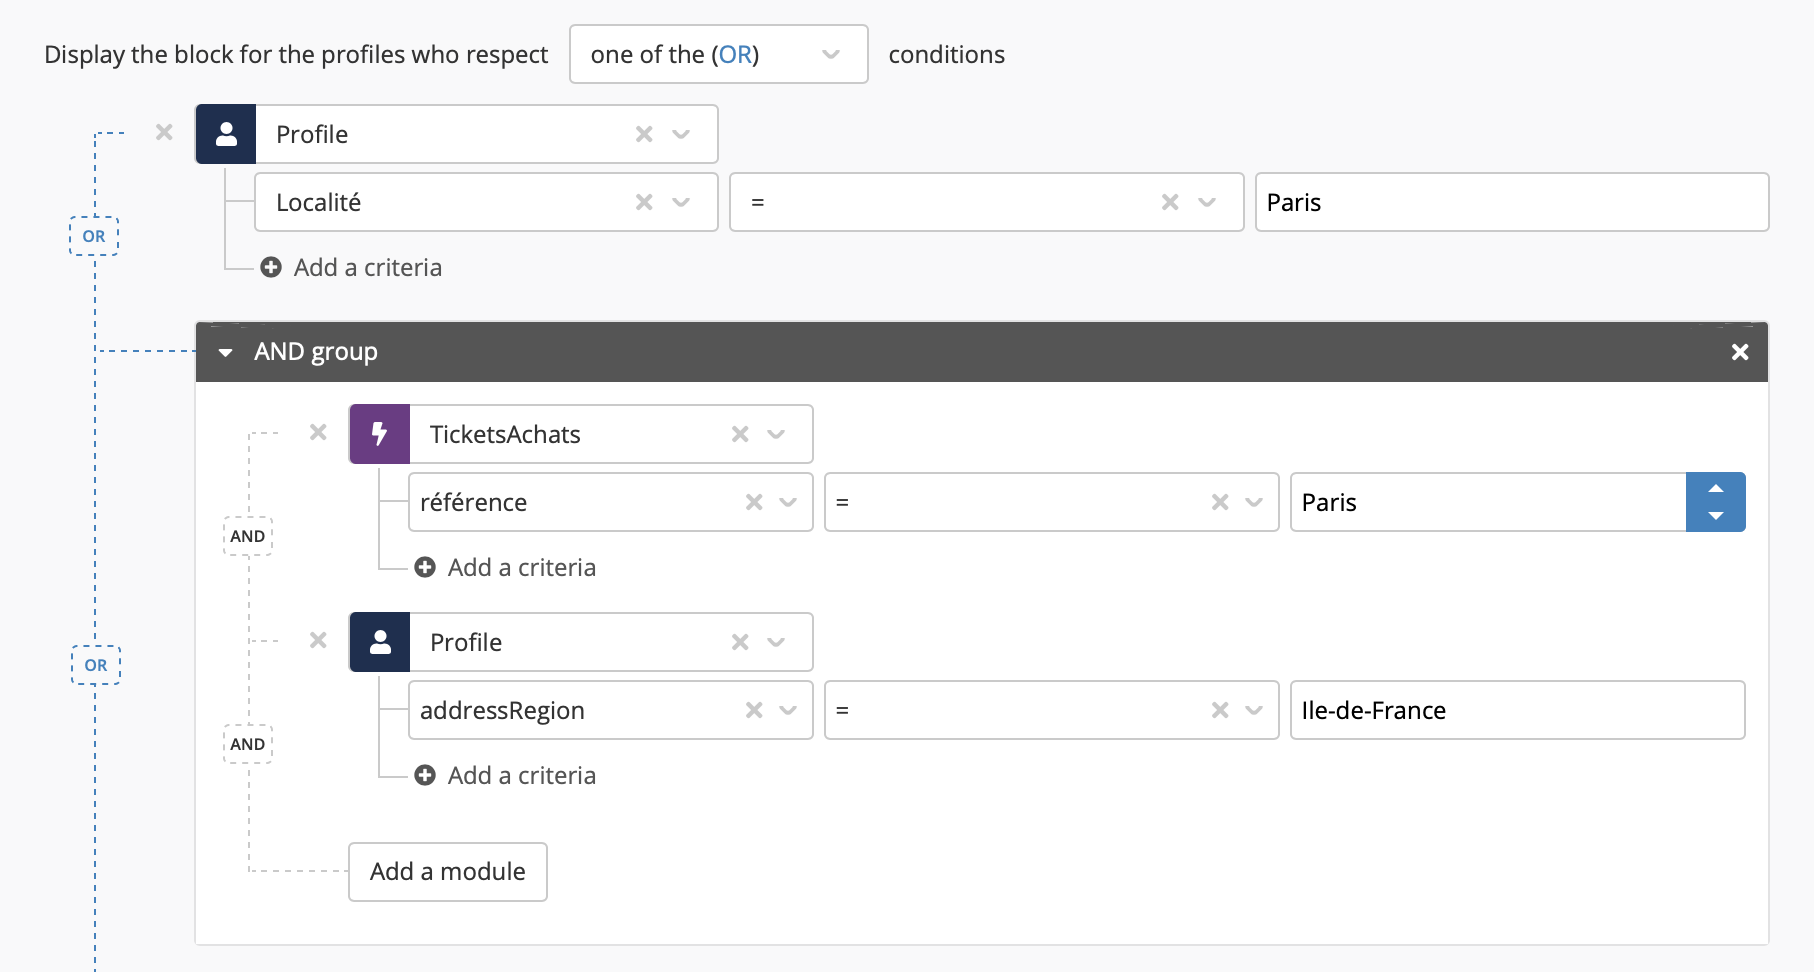
Combining two levels of parameters
You have the possibility to add groups by using the opposite operator to the main operator, just like when defining a target. This allows for a greater degree of accuracy in your conditions.
For example: let's imagine that we want to display something only to the clients who
live in Paris
OR
have made a purchase in our Paris shop and live in the region of Paris.
To define the second criterion of the description, we will have to combine a profile module and a custom table.
In this case, we can use OR as the main operator and add an AND group with the two sources of the second group.
Finishing
Once the criteria have been defined, you will have to save them by clicking on the "Save" button, at the right bottom.

Duplicating an existing condition
It is not unusual to display some specific content for the profiles matching a given criterion, and some other different content for those matching the opposite criterion.
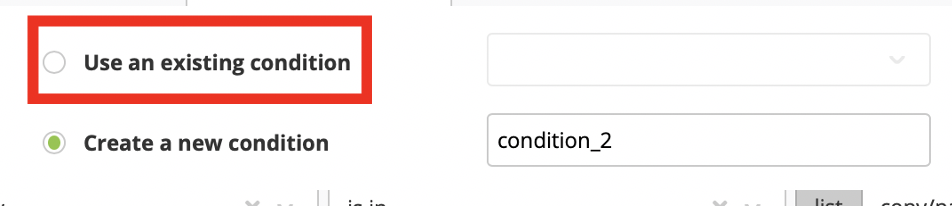
Instead of creating a second condition from scratch, you can just duplicate the first condition.
For that, select the option "Use an existing condition" when creating the new condition.
Be careful! Do not directly modify the existing condition, for that would also modify the first block. You can apply the same condition on several blocks at the same time.
To create a second condition, click on "Duplicate".
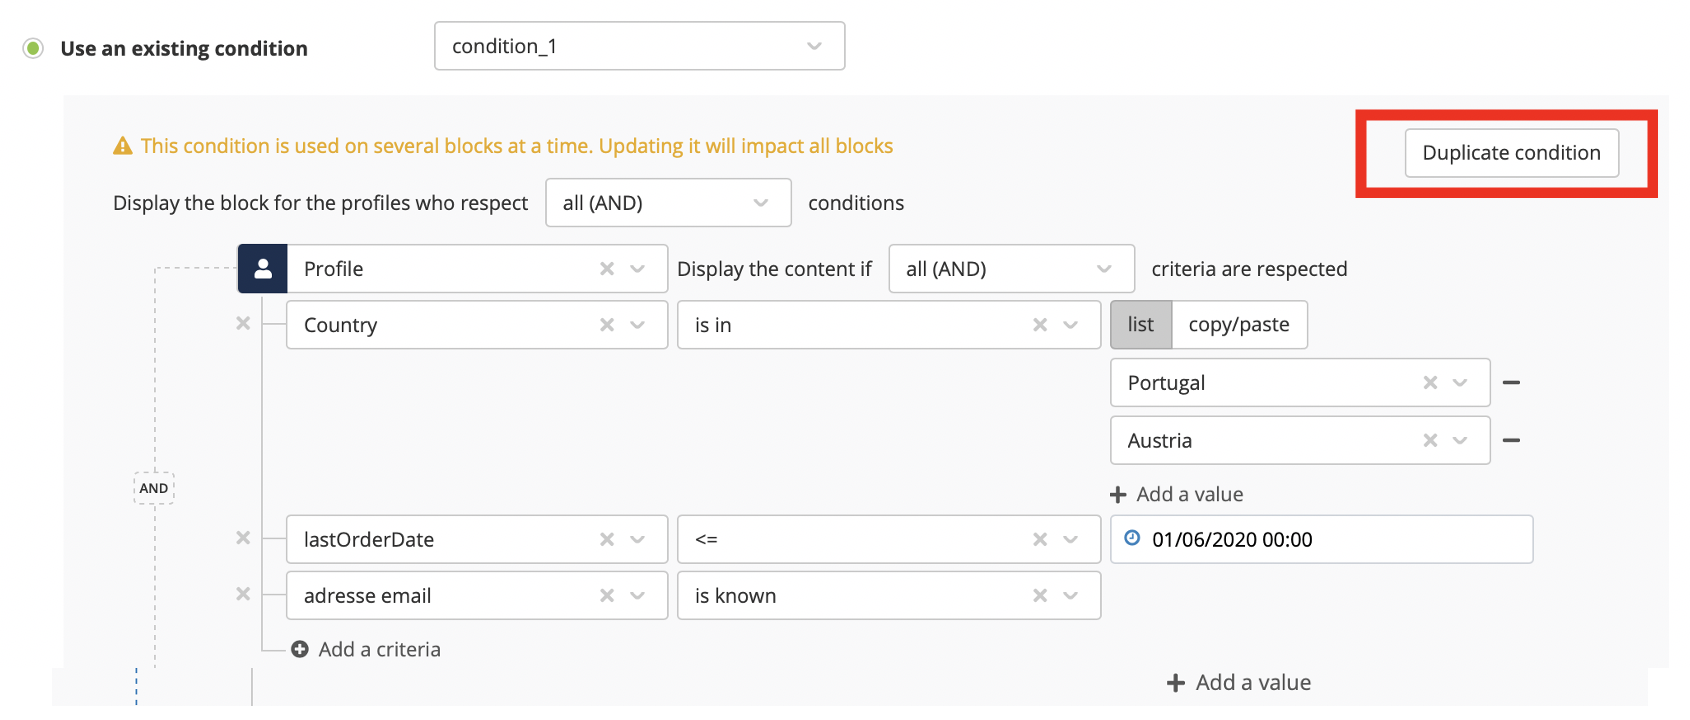
A new condition will be created based on the first one and you will only have to reverse the operators to define the condition on the alternative content.
Viewing an existing condition
When a condition has been defined for a block, the "Condition" icon will be green.

You can edit or delete the condition.

The Personalizations interface offers you a complete view of all the conditions defined.
You will find them under the Personalizations, in their own tab.
Tip
Don't forget to turn on the expert mode if you want to view the conditions!
Defining a condition through an HTML file
When coding or importing your own HTML, it is possible to define a condition by adding the attribute data-actito-if= in the email section for which you want to create the condition.
This implies only establishing the association between the condition variable and the relevant HTML section. For example: data-actito-if=${condition1}
You will then need to set the parameters for the different criteria through the Actito interface, via the Personalizations tab (cf. previous section). It is not possible to code the parameters directly on the HTML file.
<td data-actito-if=${condition1} align="left"><a href="https://www.actito.com/en-BE" target="_blank" style="border:0;"><img src="https://pbs.twimg.com/profile_images/1194974678969917440/HWjtzNpP_400x400.jpg" width="640" height="390" class="resize320" style="display:block; border:0; width:100%; height:auto;" alt="" /></a></td>