Setting up a Goal
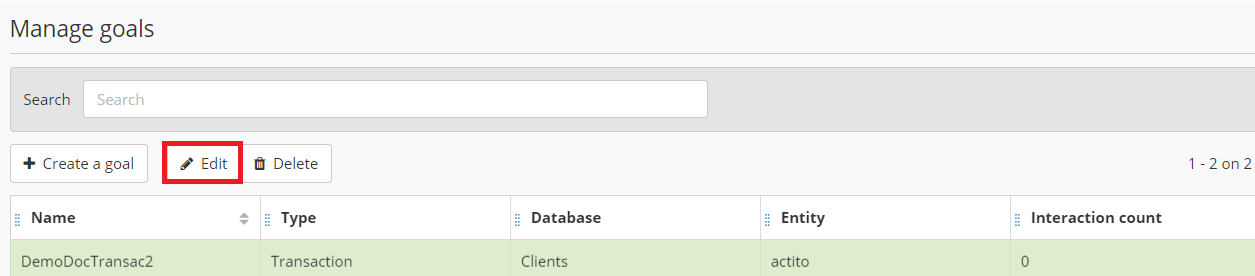
To create a "Goal", go to the 'Manage goals' application (Catalog > Goals > Manage goals) .
In the application, existing goals are divided between three categories:
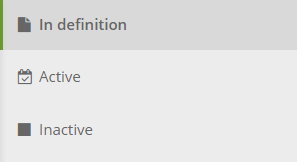
In definition: displays goals that you started creating but that you did not finish
Active: displays active goals, which means they store interactions. They can be deactivated at any time
Inactive: displays goals that were deactivated. They can be activated again at any time.
To create a new goal, click on the '+ Create a goal' button which appears in all three tabs.

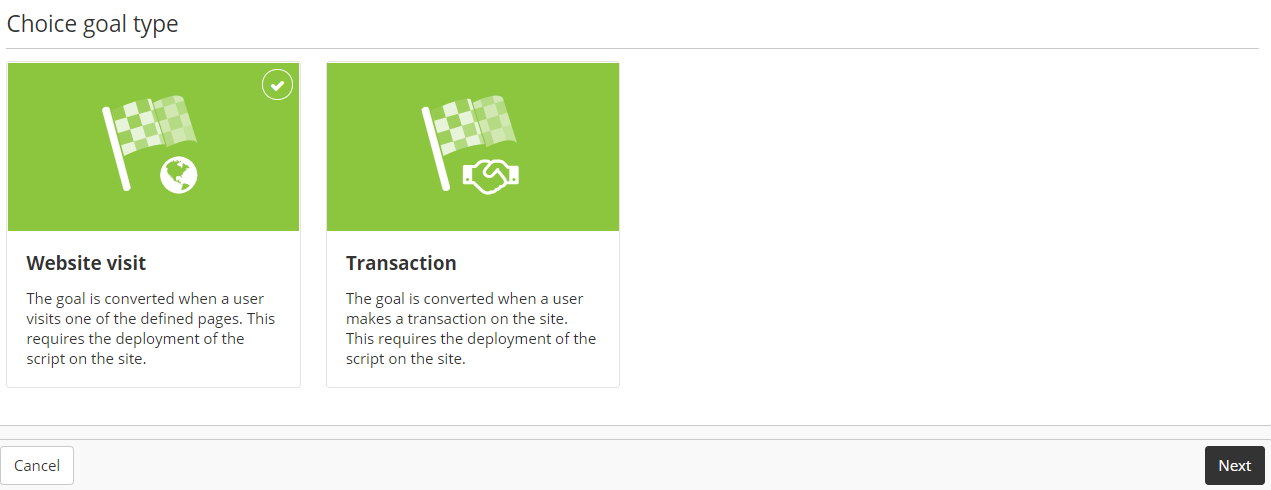
Next, you will have to choose what type of goal you want to set up.
Types of goals
There are two different kinds of goals in ACTITO:
Website visit goals: This type of goal will be validated after visiting a predefined page. This allows you to identify the interests of your profiles, either for a brand in general, or also for a particular product, an event,...
Transaction goals: This type of goal will be validated following an order confirmation. This allows you to identify transactions made by your profiles, while retrieving additional information about them as well as identifying the communication campaign which led to this transaction.
Good to know
The notion of transaction goal is not exclusively aimed at the e-commerce sector. You can use them to record every action with a measurable value for your activity: for example, registering for an event, downloading a car leaflet , requesting information about a banking product,...
Website visit goal
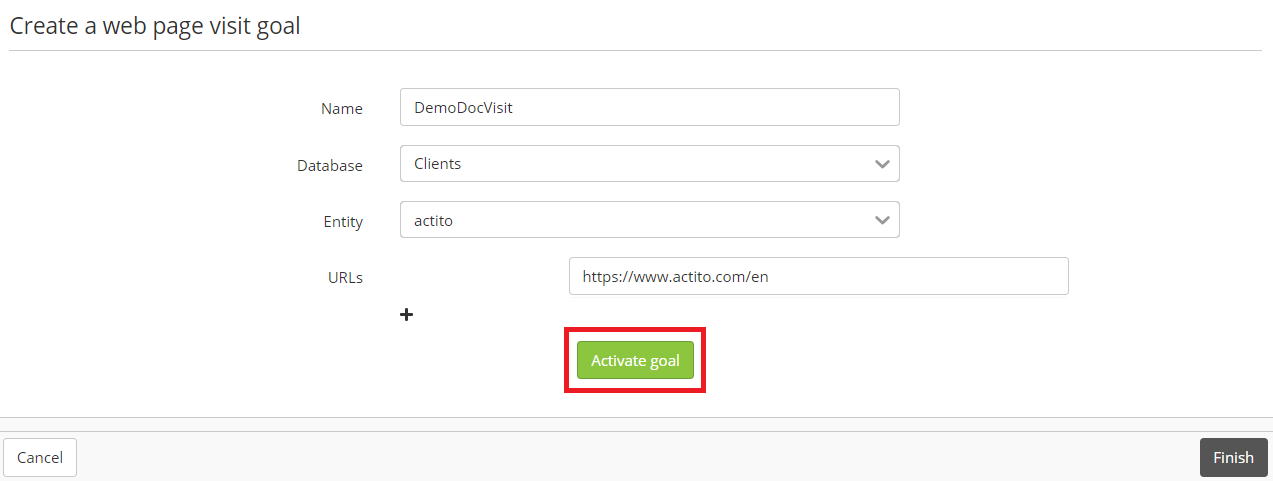
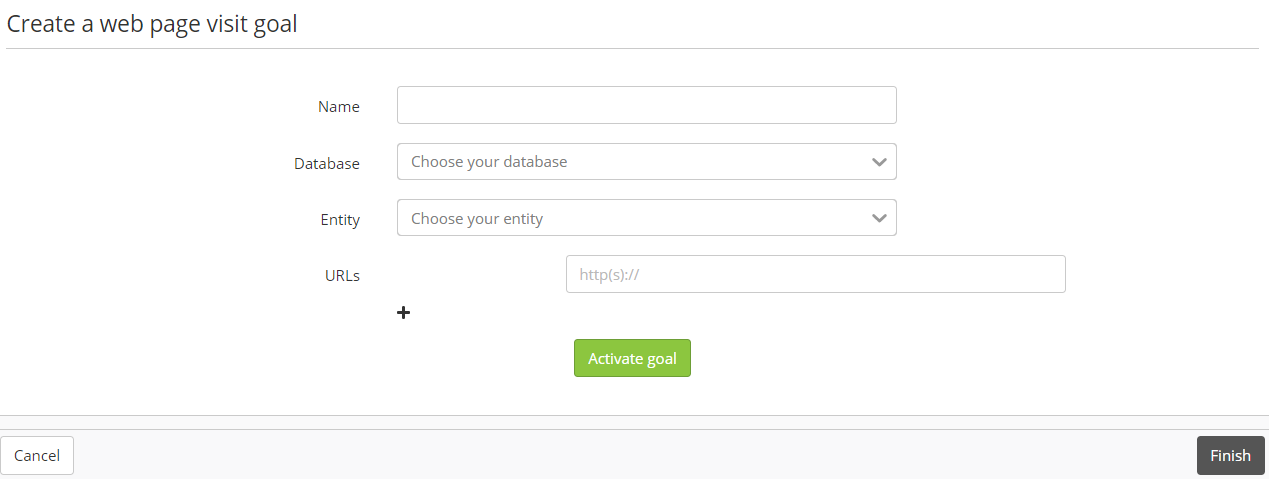 During the creation of a webpage visit goal in ACTITO, you will need to name your goal, select the targeted profile database, then choose the entity on which the goal will be stored. After the goal activation, it is no longer possible to modify the database and the entity on which the goal is based.
For this kind of goal, it is also necessary to specify the URL addresses that you want to track with your website visit goal. You can add additional URLs by clicking on the '+' button.
Tip
By adding /* at the end of an URL, you will track all the children pages of this address.
For example, www.shop.be/accessories/* will enable you to track all the pages contained in the 'accessories' category.
When a profile visits a page tagged with the JavaScript and matching one of the URLs you defined, the goal will be 'achieved' and ACTITO will create an interaction linking the profile to this goal and store the visited URL.
Info
For website visit goals, only one interaction can be created per goal, per profile and per day.
Transaction goal
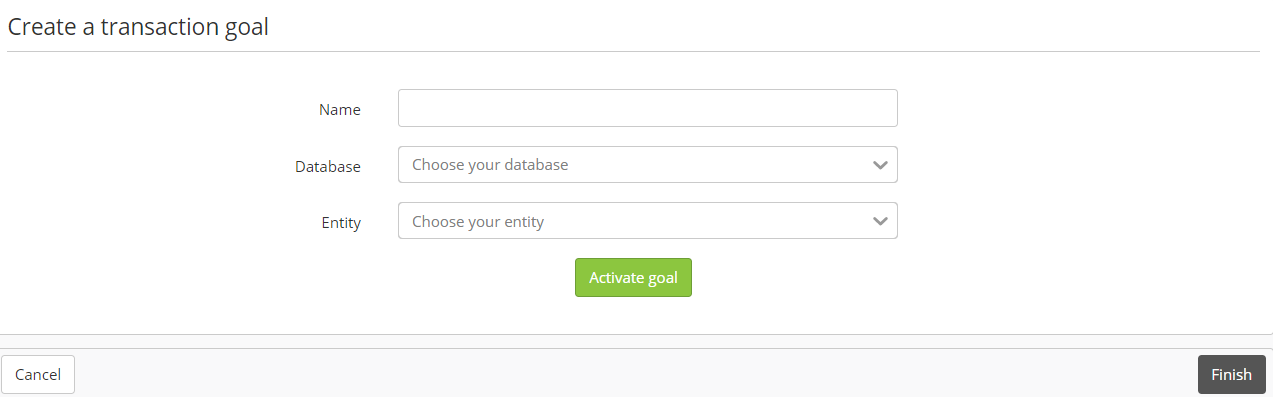
During the creation of a transaction goal in ACTITO, you will need to name your goal, select the targeted profile database, then choose the entity on which the goal will be stored. After the goal activation, it is no longer possible to modify the database and the entity on which the goal is based.
For this kind of goal, it is not necessary to specify the URL addresses that you want to track. In fact, the script will need to be inserted on an order confirmation page, so that reaching this page will notify ACTITO that an order has been made. ACTITO will create an interaction linking the profile to this goal and store additional information communicated to the goal via the script.
The amount of the transaction, in cents
The source of the transaction
A comment
The ID of the transaction
Info
For transaction goals, one interaction will be created for each transaction.
Activating the goal
After defining the components of your goal, click on the green button 'Activate goal' in order to activate it and to start collecting interactions.
If you click on 'Finish', the settings of your goal will be saved, but it will not be activated. This goal would appear in the 'In definition' tab, where you will be able to modify or activate it with the 'Edit' button.
Retrieving your script
After defining the settings of your goal and activating it, you will have to retrieve the script which will be inserted on your web pages. For detailed information about how to handle this script, we invite you to read the 'Managing the goal tracking script' section.
Generating the cookie
The last step will be activating the generation of cookies, which are necessary for the script to function properly.
There are two options to drop this cookie on the browser of the user: