Creating a Form
To start the creation of your form, go to the 'Manage forms and pages' application (Catalog > Forms and Pages > Manage forms and pages)

After opening the application, click on the '+Create' button located above the rows.

This interface also allows you to select an existing 'In definition' form in order to edit or delete it.
Tip
For better time efficiency, it is possible to copy an existing form whatever its status may be.
Step 1 - Select design
The first step will be to select a template in the ACTITO library.
A template is a pre-formatted canvas that you can easily adapt in order to suit your own needs.
This page is made of two sections :
Custom templates library
There are templates specific to your licence. They are available in the upper section of the template selection page.
Indeed, ACTITO gives you the opportunity to order templates matching your specific requirements. They might:
Follow you graphical charter
Display default images images and logos
For additional information about custom templates, we advise you to contact your account manager.
ACTITO templates library
The lower section of the page will display the templates put at your disposal by ACTITO:

'Enrichment double column' and 'Enrichment single column': The first two templates of the standard library enable you to create a form which is able to enrich your Profiles database. The main difference between them is that the template with two columns allows for the display of an image within the form.
'Landing page' and 'Landing page mobile': The next two templates are used as a landing page for your e-mail and SMS campaigns.
'Preference center': The last standard template is especially used for the creation of a 'preference center', which will allow your contacts to directly manage their subscription preference. For additional information on this subject, we invite you to read the 'Creating a Personalized Unsubscribing Process' chapter.
Step 2 - Customize design
At this stage, you will be able to customize the design of the template in order to adapt it to the purpose of your form.

The following customization options are available :
-
Theme
Upload a background image and define a theme color
-
Header
Upload a banner
-
Buttons
Rename the 'previous' and 'next' buttons (for example, 'Confirmation' or 'Subscribe')
-
Form
Give a title to your form and a name that will be displayed in the browser tab.
Recommended size of the banner
Thanks to responsive design, the picture size will automatically adapt to the screen resolution on which the form is read.
However, the maximum size for a standard form is 800 pixels, which means that an image larger than 800 pixels will be automatically downsized.
Moreover, the weight of the background image and of the banner should not exceed 1 MB.
Step 3 - Main parameters
This step consists in defining the main parameters of your form.
General data

Naming your form is required. This name will be used to find your form on the form management interface.
Select the entity on which you are working.
Next, select the main language of your form. This is the language you will use to define your form. You will be able to add new languages and translate your questions at a later stage.
Participant parameters

You have two options to fill the 'Participant database' field:
Leave it to 'anonymous participant' if the survey is not intended to be linked to ACTITO profiles
Select the database that you want to connect to the form. Only profiles included in this database will be able to access this form. This will enable you to use the answers to update the database, or to use them for customization and targeting.
If you choose to link this form with one of your databases, you will need to select whether whether several participations are allowed for a single profile. There are three possibilities:
Yes: Profiles will be able to answer the form as many times as they wish.
No, but the participation can be updated by the participant: This option allows profiles to change their mind, which may be needed for event registrations. However, when it comes to database enrichment, only the first participation will update the database.
No, and the participation cannot be updated: This option limits to a single participation (for example, a contest). It will require you to add a 'single participation' page in order to inform profiles attempting to fill in the form several times.
Single participation is not available if the form is public, as ACTITO may not identify the profile of each participant.
Tip
If you allow multiple participations, ACTITO will not register interactions for each participation. The first participation will be updated instead.
If you define database enrichment rules, only the first participation will update the profile.
Form pages
 In order to improve the structure of your form, it can include several question pages, which will let you address various themes or define display conditions for specific pages.
Additional pages

The following pages are available:
Start: You can design an introductory page displayed before the questions. This page can only contain text as well as the banner selected at step 2
End: This page will be displayed upon completion of the form (for example, to thank your contacts for their participation)
Closed: It will inform your contacts that the due date of the form is passed and that participation is no longer possible
Privacy agreement: This page will detail your privacy agreement, which is good practice for GDPR compliance
Rules: You can set up participation rules, such as for a contest
Unique participation: If you chose to refuse multiple participations at step 3, this page will be displayed if profiles attempt to fill in the form more than once. For communication reasons, this page is mandatory for unique participation
Step 4 - Define questions
Next, you will design the body of your form and its main feature: the questions.

At this stage, it will be possible to add questions to your form by clicking on the "Add page element" button. Each question will belong to a specific page. You can navigate between pages with the help of the chart to the left of the screen. The number displayed inside the grey bubbles stands for the amount of questions on each specific page.
For a detailed explanation about preparing your questions, we invite you to read the 'Defining the questions of a form' chapter.
In addition to defining the questions of your form, this page also allows you to :
Modify the technical questions of your form
By default, these consist in storing the language and the source of the form.
Display a preview of your form
First, you will need to select a profile from your testing group, otherwise it will not be possible to generate the preview. You can also display the mobile version thanks to the icon in the top right corner of the preview screen.
Modify the questions order
Click on the grey border to the left of your question then drag and drop it to modify the layout of your form.
Delete a question
A question can be deleted by clicking on the cross to the right.

Edit a question
After creating a question, it is still possible to edit it as well as to modify answers parameters and display conditions.
To edit a question, click on the 'pen' icon next to its title.
Page parameters
The "Page parameters" tab lets you apply display condition to each page. These conditions allow you to only display the pages if specific specific conditions are met.
There are two kinds of display conditions :
Conditions on other questions: Display the question only if another question has been answered, has not been answered, or if a specific answer has been given. This allows you to set up sub-questions appearing only after answering the main question. Each operator is also associated with its contrary, allowing you to also exclude a question upon a specific answer.
Conditions on profile attributes: Target your questions by displaying them only if a specific attribute is known, or if it holds a given value. For instance, you can display your question only to women, to people from a chosen region,...
You can apply several display conditions and decide whether all of them must be met (AND) or if the fulfillment of only one is enough (OR).
This allows you to set up a completely different version of your form for different categories of profiles, or to prepare additional pages of questions upon specific answers.

Step 5 - Define additional pages
Here you can define the additional pages that you chose to include at the 'Main parameters' stage. If you changed your mind, you can also include or remove them at this stage.
To do so, you can simply check or uncheck the 'Show this additional page' box.

If you update the 'Privacy agreement' page of an active form after modifying your privacy protection policy, ACTITO will store the version in effect when each contact gave their consent or an 'opt-in' through a form. This information is not available directly via the interface. You can reach it by requesting an audit trail, where you will be able to view the version accepted by each particular profile.
You can preview the layout of your pages. You will need to select a profile from your testing group, otherwise it will not be possible to generate the preview.
After that, click on next.
Step 6 - Database enrichment
This step will let you choose how to update your profile database.

As database enrichment follows very precise rules, we advise you to read the 'Updating a database through a form' chapter for detailed explanations.
It is still possible to modify the database enrichment rules after the publication of the form. However, this would not revert any update to a profile attribute following a participation recorded before updating the enrichment rule.
Step 7 - Add languages
If your form is multilingual, you can select additional languages at this stage.

Step 8 - Translation
You will only need to complete this step if you chose additional languages at the previous step. You will be invited to provide a translation for each bit of text in the additional language chosen.

The side by side display will let you easily provide the corresponding translation to each of the questions and answers. If you included more the two languages, you will be able to modify the display language by clicking on the flag icon.
By clicking on the arrow icons, you will be able to replicate the text of the default language, should it be identical in the other languages.
You will also have to translate any additional page you might have selected.
Step 9 - Test form
Before publishing your form, you have the opportunity to test it.


Select the test language, then a profile within your testing group. For additional information about these, we invite you to read the 'Testing Groups' section.
If you used display conditions depending on how the form was accessed ('source' technical question. For instance : e-mail, website, facebook,...), you can choose which version of the form to test by inputting the source in the URL parameters.
If you do not define any question or any additional page, the test will give out a 404 error.
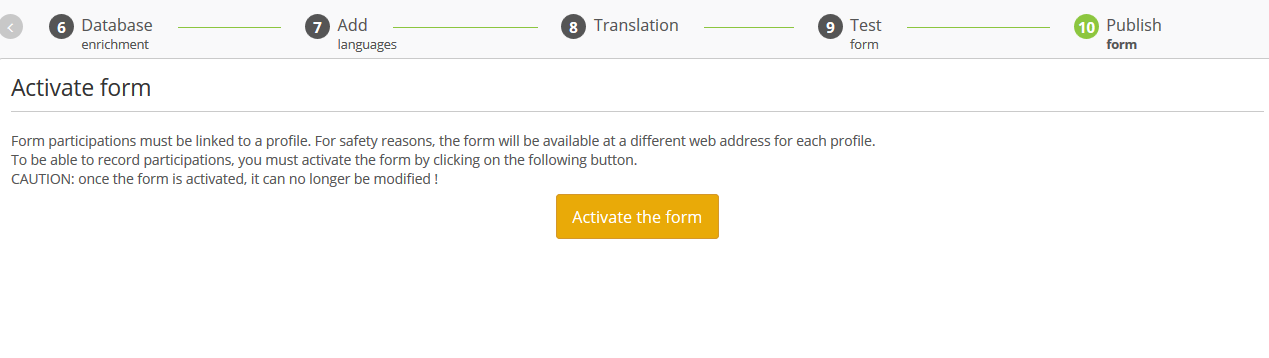
Step 10 - Publish form
The last step will depend on whether you allowed multiple participations at the third step (main parameters).
If you chose No, the form will be available at a different web address for each profile. This address will only be available through ACTITO communication means, such as an e-mail campaign. Then, you will be invited to activate the form.
If you chose Yes, you will have to chose between publishing the form on a public address or a privately secured address.
With a private address, you will be limited to direct communication with your contacts, such as e-mail campaigns, exactly as for the previous option.
With a public address, you will obtain a unique URL which will be used to share this form through the communication channels of you choice. In this URL, you can directly replace the AAA expression by the source value of your publication (website, facebook,...), in order to have different data for each of your channels. In doing so, you will determine which channel causes the best participation rate. It is even possible to carry out further analysis by having a custom link for each 'call to action' button, in order to differentiate their efficiency.

In the case of a form with anonymous participants, the form must be accessed through a public address. It will also be possible to customize the source, exactly as described above.

Once the preparation of your form is finished, you can click on 'Publish form'.
Tip
Please note that after publication, the entities and databases parameters cannot be modified anymore. However, it will still be possible to correct some parameters or to modify enrichment rules. To do so, we invite you to read "Managing an active form".