Browsing the Datamart Studio
The Datamart Studio is divided into 4 zones:
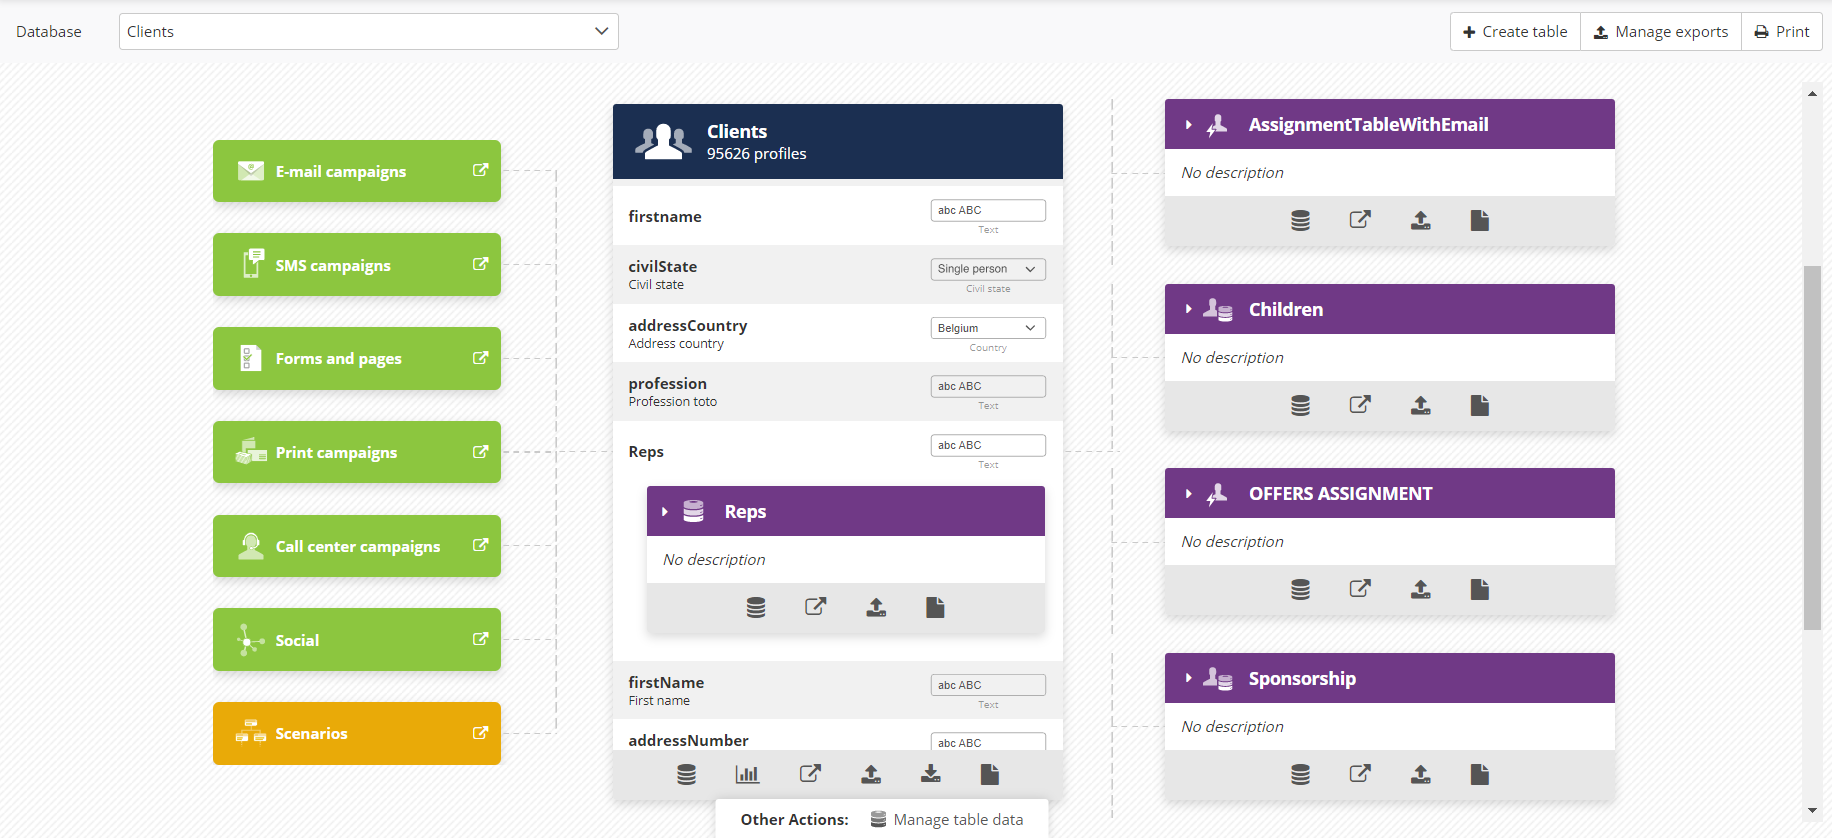
Zone 1 - Dropdown menu
If you have more than one Profile table, there will be a dropdown menu named 'Database' in the top left of the screen.
In such a case, you will have to specify the database for which you want to display the data model.

In the top right of the screen, you have access to additional features:
'Create table' allows you to create an additional custom table
'Manage exports' gives access to the export management application.
'Print' enables you to print your data model structure.

Zone 2 - Left of the screen
On the left, you can find all the available communication channels (in green) automation mechanisms (in orange).
By clicking on them, you will be directed to the ‘Manage’ application of the selected channel.
For example, the e-mail campaigns:

Info
A greyed out box means that you do not have access to this channel in your licence.
Zone 3 - Center of the screen
At the center, the selected Profile table will be displayed. It details all the attributes that are part of the table.
For additional information about this zone, see 'Understanding the central zone of the Datamart Studio : Profiles'
Zone 4 - Right of the screen
On the right, you will find the various 'Tables' linked to the selected 'Profile' table.
For additional information about this zone, see 'Understanding the zone to the right of the Datamart Studio: Tables'