Webservices related to Custom Tables
The notion of 'Custom Table' allows you to model the business activity specific to your use of ACTITO. This is possible thanks to a model of data tables directly or indirectly linked to the profile table, which stands as central element.
A licence can have several specific tables, each with their own structure and their own nature (for example: offers, orders, appointments,...).
Each of these tables can be made of attributes which allow the storage of the data necessary for the purpose of this table.
For additional information regarding the data model and Custom Table, we invite you to read the chapter dedicated to 'Data Model'.
Custom Table APIs
Creating custom tables is not possible through the ACTITO APIs. These have been created through the set up project at the creation of your licence. If your activity requires the creation of an additional custom able, you need to request it beforehand to your account or project manager.
The creation of your table is therefore a prerequisite for using 'Custom Table Controller' APIs, which allow to manage every operation related to custom tables.
Moreover, we recommend that your table already contains a record, as it will let you more easily identify the structure of the table and of its components.
As a whole, custom table APIs work in a very similar way to profile APIs. They allow to:
Obtain the structure of a table
Obtain information about table records
Create, update and delete table records
Obtaining the structure of a table
ACTITO gives you the possibility to define the content or your custom tables during their set-up, in order to adapt it to the specific needs of your activity.
After its creation in ACTITO, a custom table will be characterized by:
A name "t", for example 'DemoDocTickets'
An entity "e", which define the access rights. In this example : 'actito'
You can use the operation GET/entity/{e}/customTable to obtain the structure of this table.
This will allow you to understand how the structure of your table is transposed in the API. Thanks to this information, you will be able to more easily program POST or PUT methods to import data by correctly using every component of your custom table.
To do so, enter the name of the entity and of the table as parameters.
Tip
These names are not case sensitive
Example of response to this request: (Download this example)
Curl callcurl -X GET --header "Accept: application/json" https://test.actito.be/ActitoWebServices/ws/v4/entity/actito/customTable/demodocticketsResponse body{ "id": "daf01958-fef1-43fe-a921-12d82772dc2a", "entityId": 1, "technicalName": "DemoDocTickets", "userName": "DemoDocTickets", "category": "READWRITE", "capabilities": [ "INTERACTION", "EVENT_GENERATED_TABLE" ], "attributes": [ { "fieldName": "ref", "type": "Long", "unique": true, "required": true, "description": null }, { "fieldName": "refMagasin", "type": "String", "unique": false, "required": true, "description": null }, { "fieldName": "montant", "type": "Long", "unique": false, "required": true, "description": null }, { "fieldName": "customerId", "type": "Long", "unique": false, "required": true, "description": null }, { "fieldName": "updateMoment", "type": "Date", "unique": false, "required": true, "description": null }, { "fieldName": "creationMoment", "type": "Date", "unique": false, "required": true, "description": null }, { "fieldName": "id", "type": "Long", "unique": true, "required": true, "description": null } ], "primaryKey": "id", "businessKey": "ref", "creationMoment": "2019-02-25T16:19:08+00:00", "updateMoment": "2019-02-26T08:41:56+00:00"}This response is characterized by:
Information about the type of table
The list of attributes and their characteristics:
"Field name" is the technical name of the field, which will be used to submit data
"type": The expected field type
"unique": Whether the attribute is unique or not
"required": Whether the attribute is mandatory or not
"description": The description of the attribute
Technical information related to the table:
"primaryKey": This is the technical id of the table, which will always be an auto-generated technical attribute called "id". This technical attribute is used to identify each table record. You will never have to supply this field to submit data in your calls.
"businessKey": The business key of the table will act as the key to identify each record when submitting data in your calls. You always need to specify it.
"creationMoment" and "updateMoment": These indicate when the table was created and last updated. They will never have to be supplied in your calls.
Obtaining information about records
Obtaining information on a specific record
It might prove very useful to obtain information related to records that already exist in your table. This will give you a practical example of the information expected for your data creation calls, especially when it comes to the characteristics of its components.
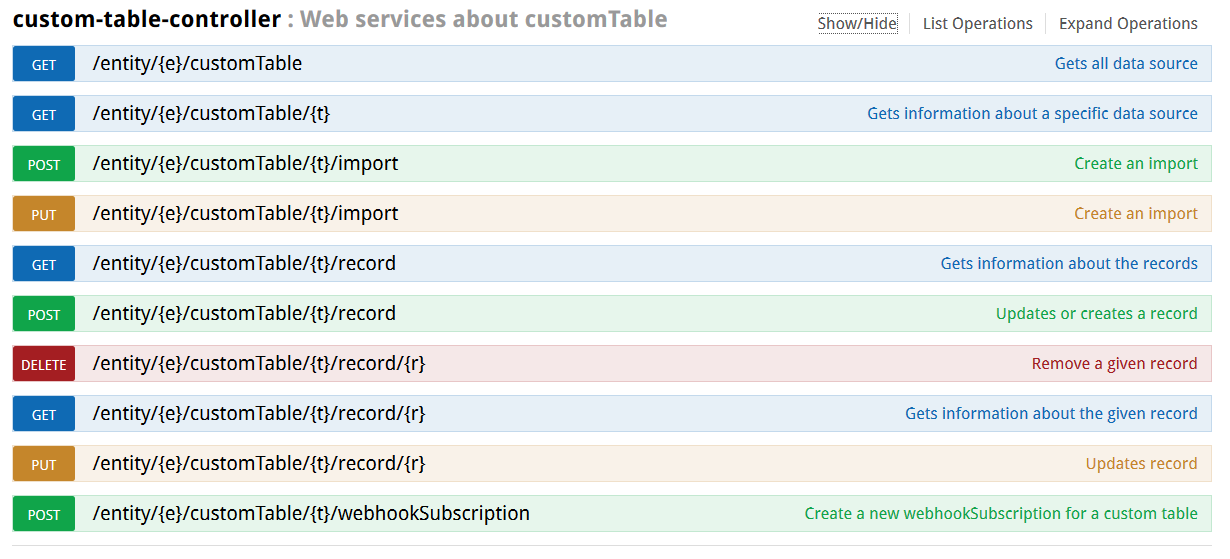
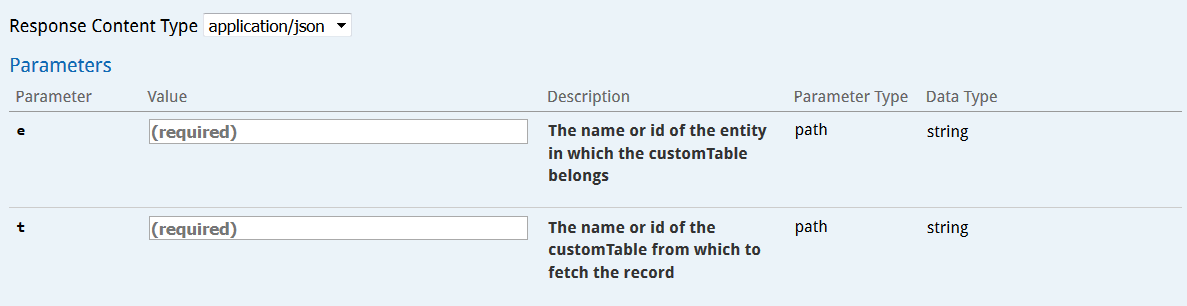
You can retrieve the details related to a record through the operation GET/entity/{e}/customTable/{t}/record/{r)
The specified parameters are as follows:
the entity on which the custom table is stored
the custom table containing the record: you can use either its technical name or its technical id
the record to be retrieved: to do so, you will need to use the business key, which you could identify by obtaining the table structure. The auto-generated technical id cannot be used here.
Example of result for this request: (Download this example)
Curl callcurl -X GET --header "Accept: application/json" "https://test.actito.be/ActitoWebServices/ws/v4/entity/actito/customTable/demodoctickets/record/32"Response body{ "properties": [ { "name": "ref", "value": 32 }, { "name": "updateMoment", "value": "2019-02-25T17:26:44+01:00" }, { "name": "creationMoment", "value": "2019-02-25T17:26:44+01:00" }, { "name": "customerId", "value": 25716 }, { "name": "montant", "value": 123 }, { "name": "id", "value": 31 }, { "name": "refMagasin", "value": "5" } ], "businessKey": "32"}Please note that some technical attributes are automatically given in the answer. These attributes cannot be modified:
"id": the auto-generated technical id
"creationMoment": the creation date and time
"updateMoment": the latest update date and time
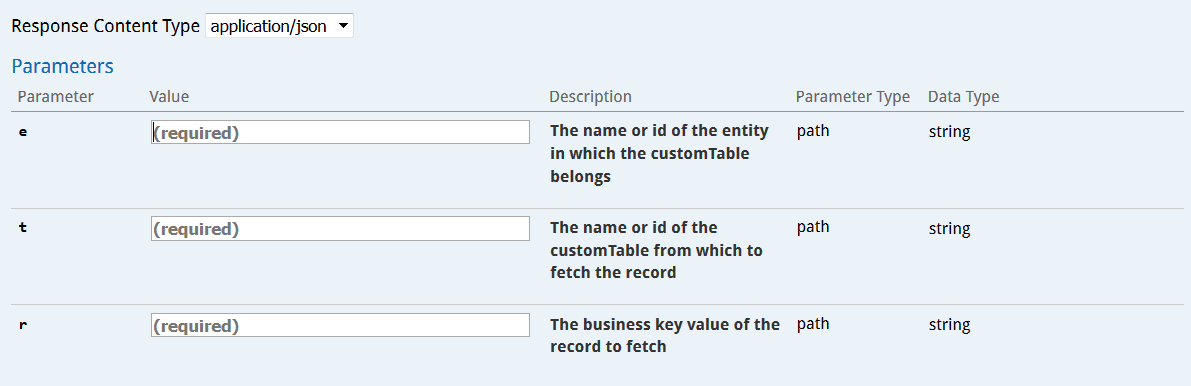
Obtaining information on records based on a query
The operation GET/entity/{e}/customTable/{t}/record will allow you to obtain information on records on the basis of specific query parameters. For example, obtaining every ticket of a particular customer.
It is first necessary to specify the given entity and custom table. You can thereafter specify the following query parameters:
"searchField": it is the technical name of the field on which the request will be based. This field must be indexed
"searchValue": specify the value of the search field for which you want to obtain the records. This is a strict equality criterion.
"sortedField": specify the field used to sort the obtained records. By default, it is the creation date. This field must be indexed
"ascending": choose whether records must be displayed in ascending (true) or descending order (false)
"number": choose the amount of records displayed (the maximum and default value is 200).
Example of a request based on a client number query: (Download this example)
Curl callcurl -X GET --header "Accept: application/json" "https://test.actito.be/ActitoWebServices/ws/v4/entity/actito/customTable/demodoctickets/record?searchField=customerId&searchValue=50662&sortedField=creationMoment&ascending=true&number=200"Response body{ "records": [ { "properties": [ { "name": "ref", "value": 49 }, { "name": "updateMoment", "value": "2019-02-25T17:26:44+01:00" }, { "name": "creationMoment", "value": "2019-02-25T17:26:44+01:00" }, { "name": "customerId", "value": 50662 }, { "name": "montant", "value": 143 }, { "name": "id", "value": 39 }, { "name": "refMagasin", "value": "3" } ], "businessKey": 49 }, { "properties": [ { "name": "ref", "value": 4 }, { "name": "updateMoment", "value": "2019-02-25T17:26:44+01:00" }, { "name": "creationMoment", "value": "2019-02-25T17:26:44+01:00" }, { "name": "customerId", "value": 50662 }, { "name": "montant", "value": 36 }, { "name": "id", "value": 40 }, { "name": "refMagasin", "value": "2" } ], "businessKey": 4 }, { "properties": [ { "name": "ref", "value": 6 }, { "name": "updateMoment", "value": "2019-02-25T17:26:44+01:00" }, { "name": "creationMoment", "value": "2019-02-25T17:26:44+01:00" }, { "name": "customerId", "value": 50662 }, { "name": "montant", "value": 30 }, { "name": "id", "value": 41 }, { "name": "refMagasin", "value": "5" } ], "businessKey": 6 }, { "properties": [ { "name": "ref", "value": 7 }, { "name": "updateMoment", "value": "2019-02-25T17:26:44+01:00" }, { "name": "creationMoment", "value": "2019-02-25T17:26:44+01:00" }, { "name": "customerId", "value": 50662 }, { "name": "montant", "value": 75 }, { "name": "id", "value": 42 }, { "name": "refMagasin", "value": "4" } ], "businessKey": 7 }, { "properties": [ { "name": "ref", "value": 19 }, { "name": "updateMoment", "value": "2019-02-25T17:26:44+01:00" }, { "name": "creationMoment", "value": "2019-02-25T17:26:44+01:00" }, { "name": "customerId", "value": 50662 }, { "name": "montant", "value": 18 }, { "name": "id", "value": 43 }, { "name": "refMagasin", "value": "1" } ], "businessKey": 19 } ]}Creating and updating table records
The creation and update of custom tables is very similar to the corresponding profile tables operations. You therefore need to choose between the two options available for creating and updating custom table records: one by one or in bulk. Choosing between these two processes must be based both on the requirements of your own business activity but also on the limits regulating the use of webservices.
You should therefore ask yourself the following questions:
Is real-time synchronization necessary?
Do you need to trigger real-time scenarios?
Which volume are you handling?
Is your preferred method compatible with the call limitations?
Bulk APIs must be used when data can be accumulated until reaching a volume large enough for batch processing. The mass import API method is not meant to repeatedly post light files containing only a few records. The is indeed a limitation of 12 bulk calls per day. Moreover, mass imports are asynchronous. Posting several files at once is not an accepted practice, as they will be taken into account one after the other.
On the other hand, when the data is designed to trigger a workflow or must be immediately synchronized with the database, you should opt for one by one calls.
Should the specificities of your activity require a mix of real-time synchronization and daily synchronization, we advise you to divide your calls between mass imports and one by one calls on a case by case basis depending on the volume and immediacy required.
Creating or updating a single record
One by one calls are preferred when the data are used to trigger a workflow or that they must be immediately synchronized with the database.
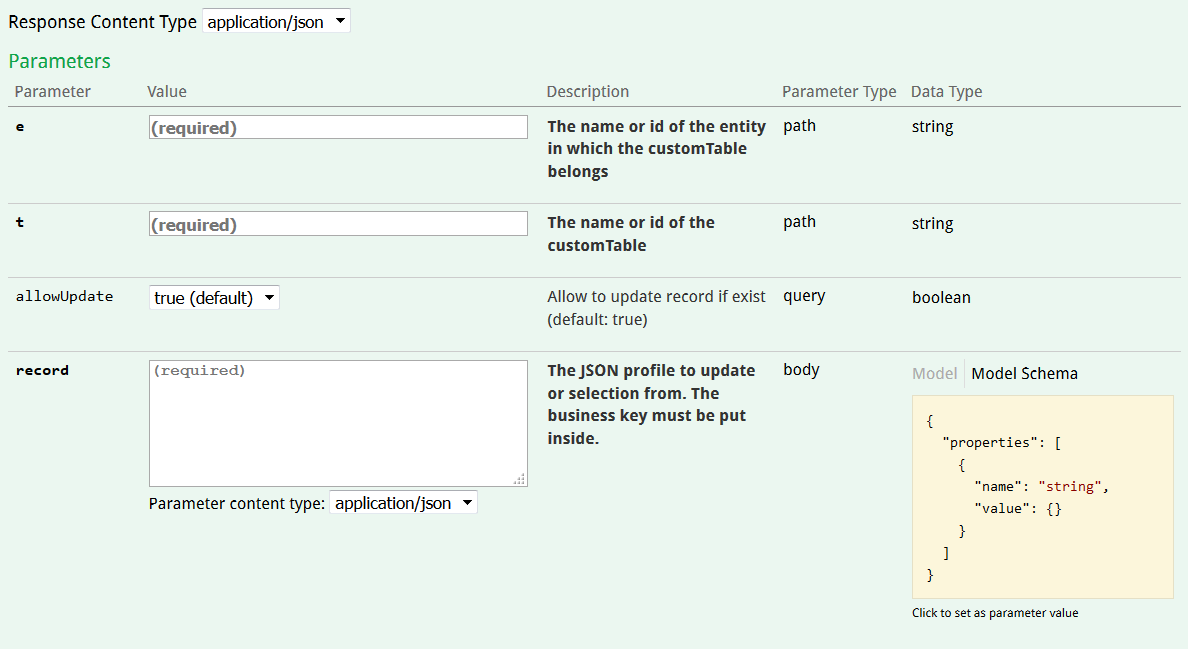
It is possible to create or update a custom record through the operation POST/entity{e}/customTable{t}/record
This method involves using a JSON code block in order to submit the data associated to the given profile. It is therefore advised to get to know the structure of the custom table beforehand, as explained at the top of this page.
The following parameters must be provided:
The entity to which the table belongs:
The name of the profile table to which the profile will be added, or the containing the profile to be updated
"allowUpdate": This parameter allows you to choose whether you want to update a profile should it exist already. Indeed, POST is above all a creation method, but it can be used for updates
"record": Characteristics of the given record, inserted as JSON code. The schema to the right of the Swagger technical documentation provides you with a model of the expected structure of this code. It is an array made of pairs of the properties technical names ("name") and the values that they must take ("value")
Example of request including the JSON code submitted in the "record" parameter: (Download this example)
Curl callcurl -X POST --header "Content-Type: application/json" --header "Accept: application/json" -d "{ \"properties\": [{ \"name\": \"ref\", \"value\": \"185\" }, { \"name\": \"refMagasin\", \"value\": \"2\" }, { \"name\": \"montant\", \"value\": \"93\" }, { \"name\": \"customerId\", \"value\": \"34567\" } ]}" "https://test.actito.be/ActitoWebServices/ws/v4/entity/actito/customTable/demodoctickets/record?allowUpdate=true"Response body{ "businessKey": 185}The response will be the business key of the record that you just created or updated.
Creating or updating records in bulk
Populating custom tables in bulk is possible through the ACTITO APIs. They allow mass imports based on ZIP files containing table data. The mass import process for custom tables is exactly the same as for profiles mass imports.
For additional information about the expected format of the file, the result of the import or any error potentially encountered, we invite you to read the page on profiles mass imports.
The ACTITO public APIs allow you to import custom table records in bulk through the operation POST/entity/{e}/customTable{t}/import
This call can be used to submit a ZIP file containing a CSV file with the new table data.
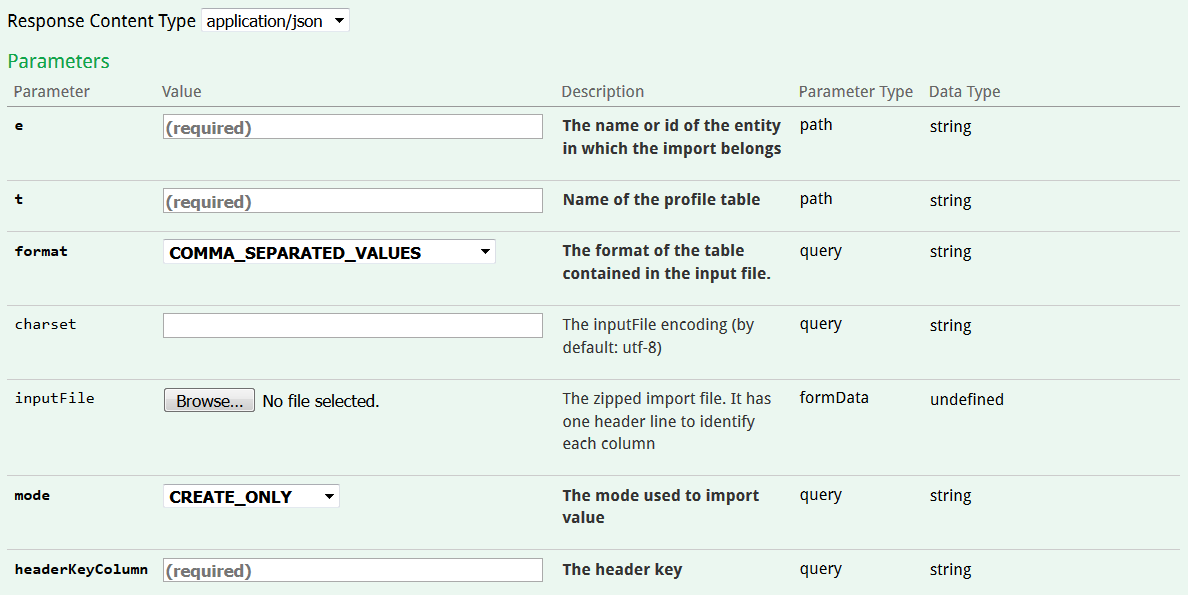
The following parameters must be provided:
the name of entity to which the profile table belongs
the name of the custom table in which you want to import data
the format of the CSVfile. 3 formats of CSV files are allowed:
COMMA_SEPARATED_VALUES (',' and line-break separator)
TAB_SEPARATED_VALUES (tab and line-break separator)
SEMI_COLON_SEPARATED_VALUES (';' and line-break separator)
"charset": Encoding of the CSV file. Default value is UTF-8.
the import mode. There are 3 possible values:
CREATE_ONLY: Load data only if they do not match any existing record in the table. In other words, the line value for the selected "headerKeyColumn" cannot exist in the database.
UPDATE_ONLY: Load data only if they match an existing profile in the table. It consists exclusively in updating existing profiles.
CREATE_UPDATE: Create a new profile if no matching profile is found in the database and update already existing profiles.
"headerKeyColumn": Name of the column of the CSV file that will used as unique data identification key. It must correspond to a unique field from the table in which data will be loaded.
Tip
Download an example of a zipped CSV file for a custom table mass import: DocImportCustomTable.zip
After launching your import, a code 200 will state that the import was successful. The response body will give you the technical id of the import.
This technical id can be used to obtain the status of the import and to identify potential errors, as explained in the page on mass profile imports.