Personalizing an SMS
ACTITO gives you the opportunity to Personalize your SMS messages and to display text elements specific to each of your contacts.
Simple Personalization
In order to Personalize your SMS message:
-
in the text body of your message, add the $ sign followed by the technical name of your Personalization ( for example, '${firstname}'),
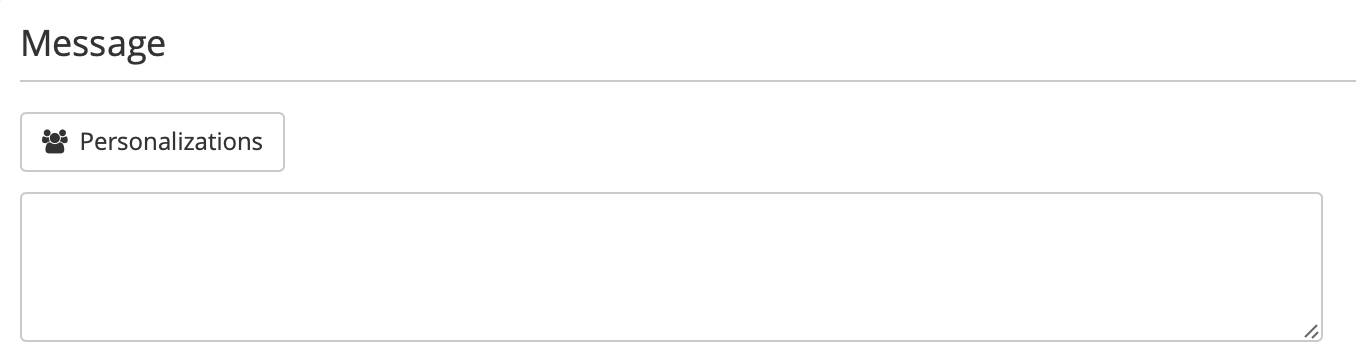
click on 'Personalizations'
-
match the correct information with the appropriate Personalization parameter.
This method works very well for basic information such as the name, gender, or any other data from the Profile table.
The use of special characters and spaces is not allowed in the technical name of a Personalization. For example, ${firstname] should be used instead of ${first name}.
If you wish personalize your SMS based on the purchase of a product, you have several options: Personalize based on the first product bought by your contact, the last one, the last one from a specific category,...
To let you achieve such a kind of Personalization, ACTITO offers an advanced Personalization mode.
Advanced Personalization
Step 1: Configuring data sources
First of all, it is necessary to turn 'Export mode' on.

Next, you will have to add data sources.
Select the data source(s) which you need to Personalize your message.

In this example, 3 sources are available.
Depending on the data available in your licence, you could have more or less.
-
File: Personalize with an external file (CSV file). This is useful to use one-off data which ACTITO does not need to store (discount codes,....)
-
Survey: Personalize with information gained from an ACTITO survey
-
Table: access all the information available in your additional tables (star model)
Once the source is selected, it will be available in the lower part of the screen and you will be able to match the correct information with the appropriate Personalization parameter.
'Multi-values' tables:
These are tables for which one profile can be associated to several lines for one profile.
For example: in an 'order' table, a person (profile) can have several lines of orders.
On which order do you want to Personalize?
By default, ACTITO will take the 'last' line.
The definition of what the 'last' line means is determined at the creation of the table. Typically, it will be the last created line in terms of date. In specific cases however, another sorting principle might be more relevant.
Example: when it comes to travel bookings, it may be more relevant to define the 'last' as the travel whose departure date is the most recent.
If you do not want to use the default option, several possibilities are offered to you:
For this purpose, click on the wheel.

There are 2 options to refine the data you want to use:

-
Provided by the scenario: this option must be chosen in the case of scenarized e-mails when the 'Start' block of the scenario is related to the value of the Personalization (For example, if the scenario is triggered by a ticket creation, a targeting,...). This will ensure that the information which triggered the scenario is the same as the information used for the Personalization.
Tip
In the case of scenarized sendings, it is necessary for the Personalization to be 'provided by the scenario', even if the scenario is triggered by a 'Targeting' start block. Instead of attempting to mirror the targeting that triggered a scenario in the targeting of the e-mail, choosing a Personalization 'provided by the scenario' will ensure your e-mail to be Personalized with the interaction that started the scenario.
-
Default + Filter: You keep the logic defined at the creation of the profile table, but reduce the spectrum of possible results.
Example
You want to send a service communication because a delivery delay is expected for all tents ordered since two days.
You can use the filter to only include tents orders from the two previous days.
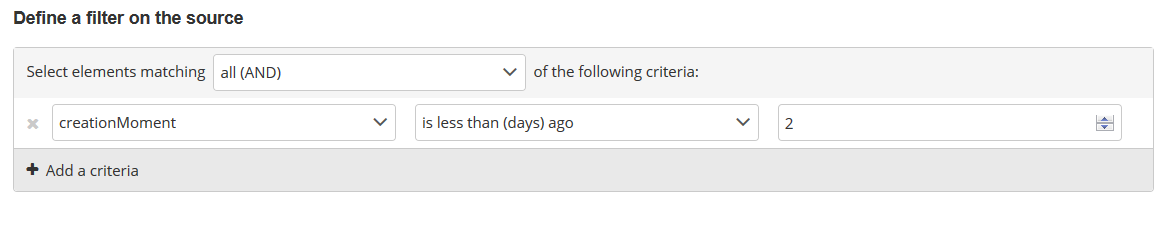
As such, you will only target people who made a tent purchase within the last two days.
Step 2: Defining Personalizations
After configuring your sources, you will be able to use them in your Personalizations.
For detailed settings, click on the wheel.

-
Default value
You can define a default value which will replace the Personalization in case there is no Personalization value available.
If you do not select a default value, the Personalization would be blank (an empty space would appear).

-
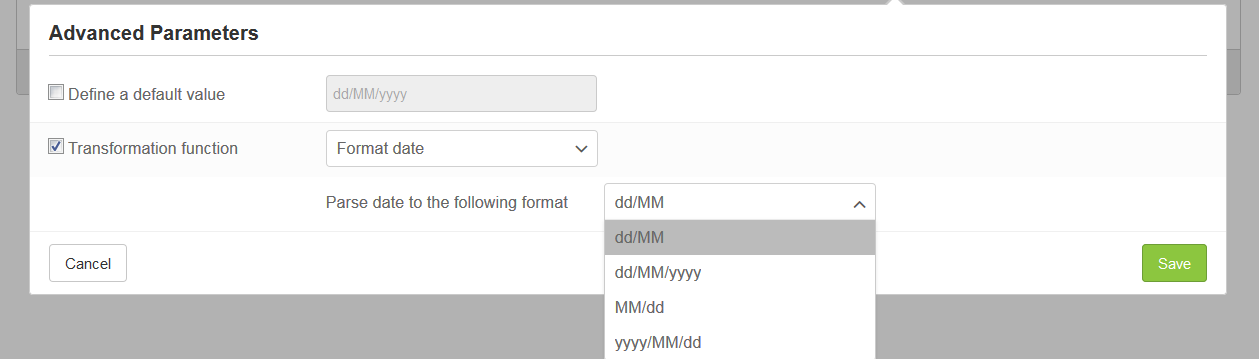
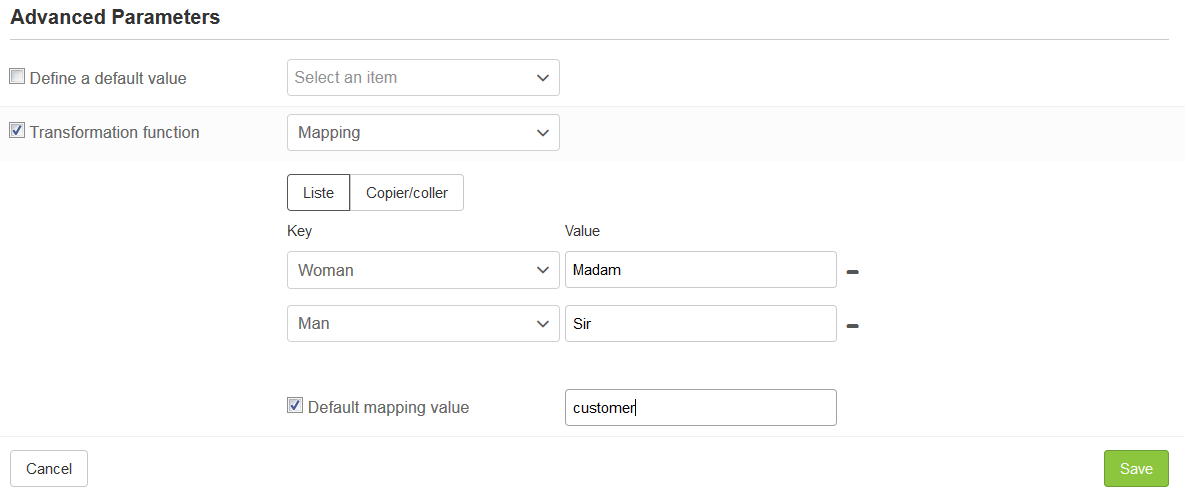
Data transformation
Specific values enable the transformation of data:
The 'Sex' attribute will let you display 'Sir' or 'Madam' instead of Man or Woman.
 You can choose the format of a date.